
Spring Summer


Fall Winter
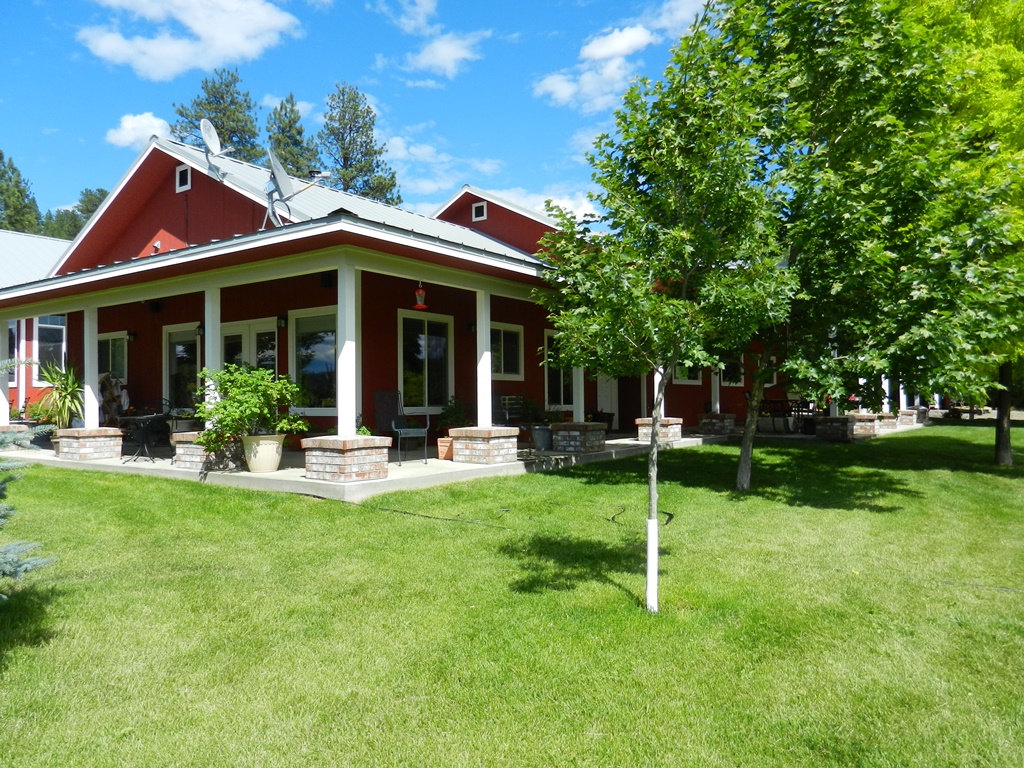
My shop is attached to our main building on the south side. It has a small but complete guest quarters (where we originally lived when first starting out here) on the west end that we use for our visitors and Inn. It is all connected to our main building through a hallway.
This is my third shop and, while still not perfect, it does correct some of the omissions and faults in my first efforts. A place where I'm going to be spending a lot of time concentrating on doing my best work needs to be well-lit, a comfortable temperature and easy to move around in. With that in mind, I built this shop a little oversized at 28’ x 36’ w/12’ ceilings with lots of light fixtures and windows. I also put numerous electrical outlets (both 110 and 220v) scattered at different levels throughout the building (even on the ceiling!). Extra insulation in the ceiling keeps the place a comfortable temperature on the dark winter days (I heat with a small wood stove) and yet a cool sanctuary in summer to escape to on hot days.
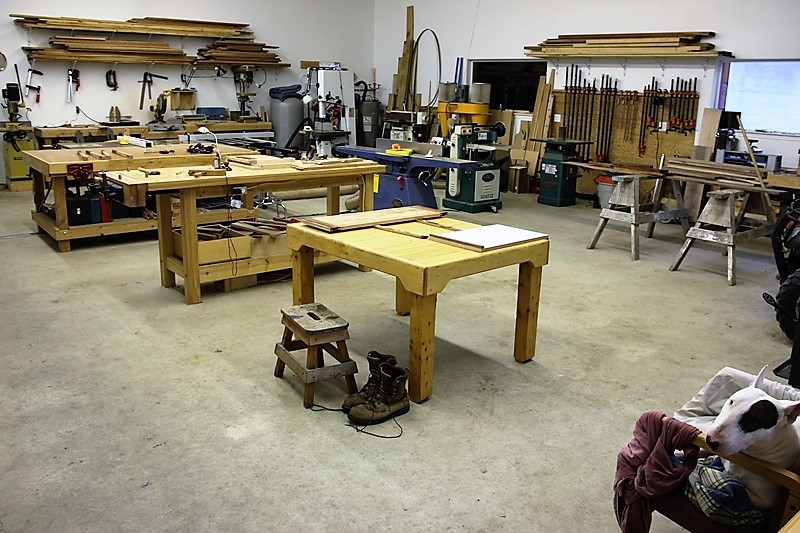
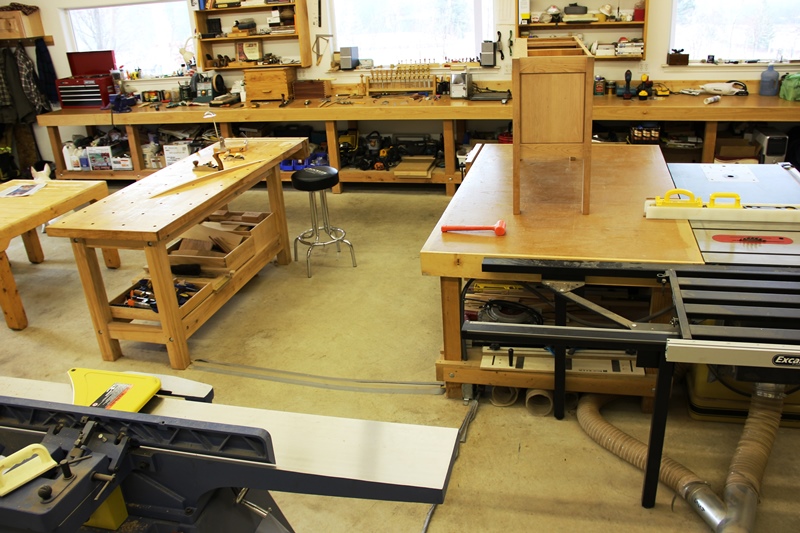
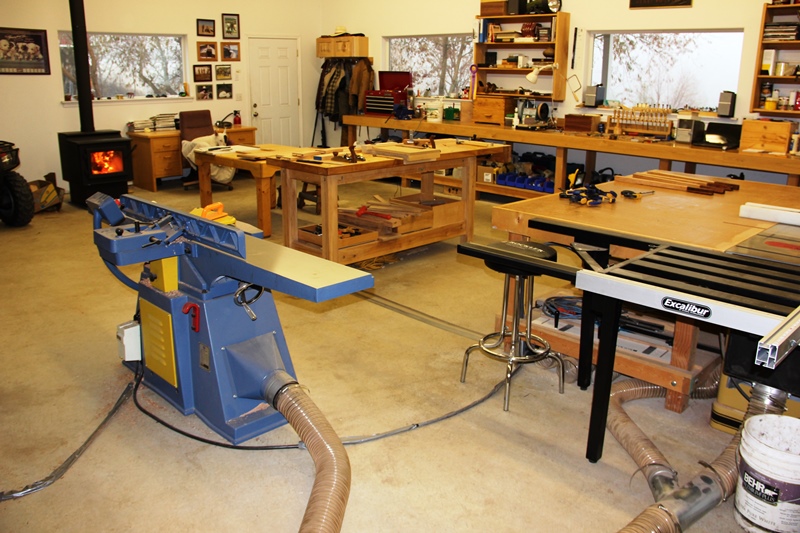
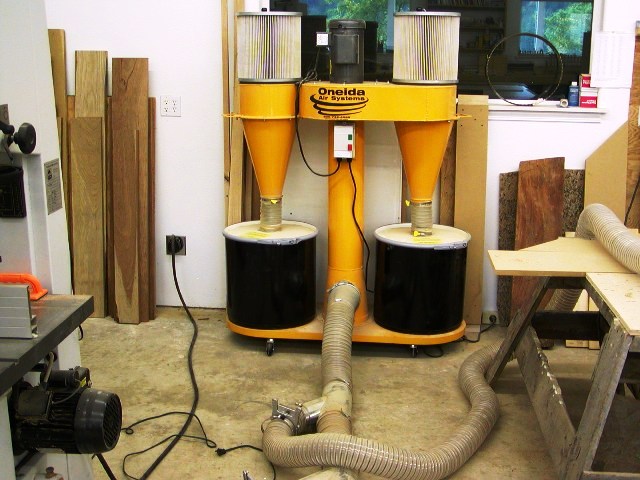
The focus of my work area is the triangle formed by table saw with large push out/assembly table on one corner, hand tool workbench on another and joiner/planer on the third. The hand tool workbench receives natural light from the adjacent window and also is convenient to the sharpening station. I tend to move parts back and forth -- from the large assembly table to the workbench for fine-tuning with hand tools and then back. I've tried various configurations and this seems to serve my purposes the best. It also gives me the convenience of having my most commonly used tools readily available, without having to carry stock all around the shop. All of the machines are connected to the Oneida Dust Collector.
I’ve seen some very beautiful wood projects created in some very small, Spartan shop environments. On the other hand, sometimes the shop takes on a life of its own, with more time and effort put into perfecting the place than in the pieces that come out of the place. And I have no problem with that. I like to consider my shop as just another woodworking project--but an ongoing project that I know will never be completely finished. After putting the finishing touches on a long project, sometimes I’ll stand back, look over my shop and think “now what did I learn from that process that I can now make some changes to my shop and maybe complete the next project more quickly, efficiently, and safely”. And sometimes I even make a few of those adjustments, but mostly, I just rush right into the next project.
Tools
My philosophy on tools is buying the best quality tool you think you could possibly afford and then keep them in tip-top shape, sharp and finely tuned. Even if it does take a little time away from actually using them, this will save time (and possibly an injury!) in the long run.
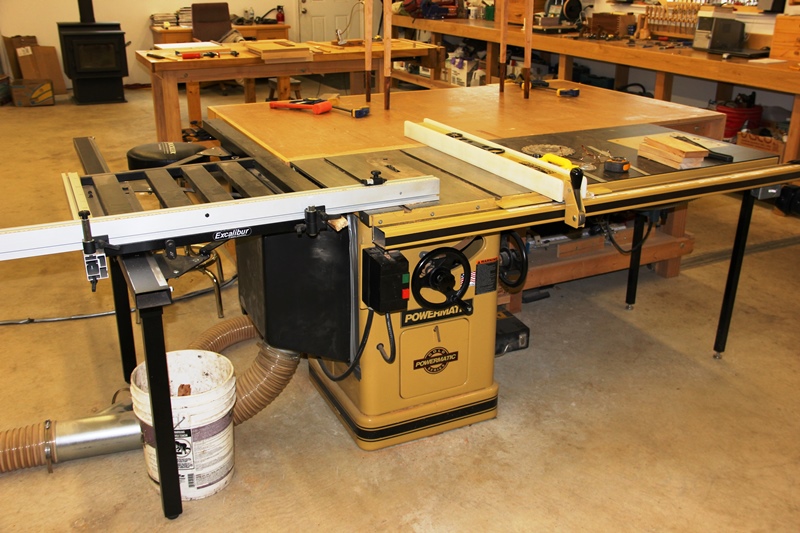
My Powermatic PM 66 Table saw and its accompanying large push-out table forms the foundation of my shop machinery. Although damaged and out of adjustment (probably from shipping to Alaska) when I first brought it home, I’ve now got it tuned perfectly. As the table saw is the cornerstone of most of my woodworking projects, having a dependable, high-quality, perfectly adjusted machine is something I consider paramount. Equipped with a Forest Woodworker II blade, I regularly remove and scrub the residue off the teeth or send it back to Forest for re-sharpening. I also do a considerable amount of dado work with the saw, including all of my tenon cutting. A lot of my assembly work is done on the large push-out table, and I find it especially useful when clamping large boards together. The right-side saw extension table also contains a router lift that I really only use for cutting rabbits anymore.
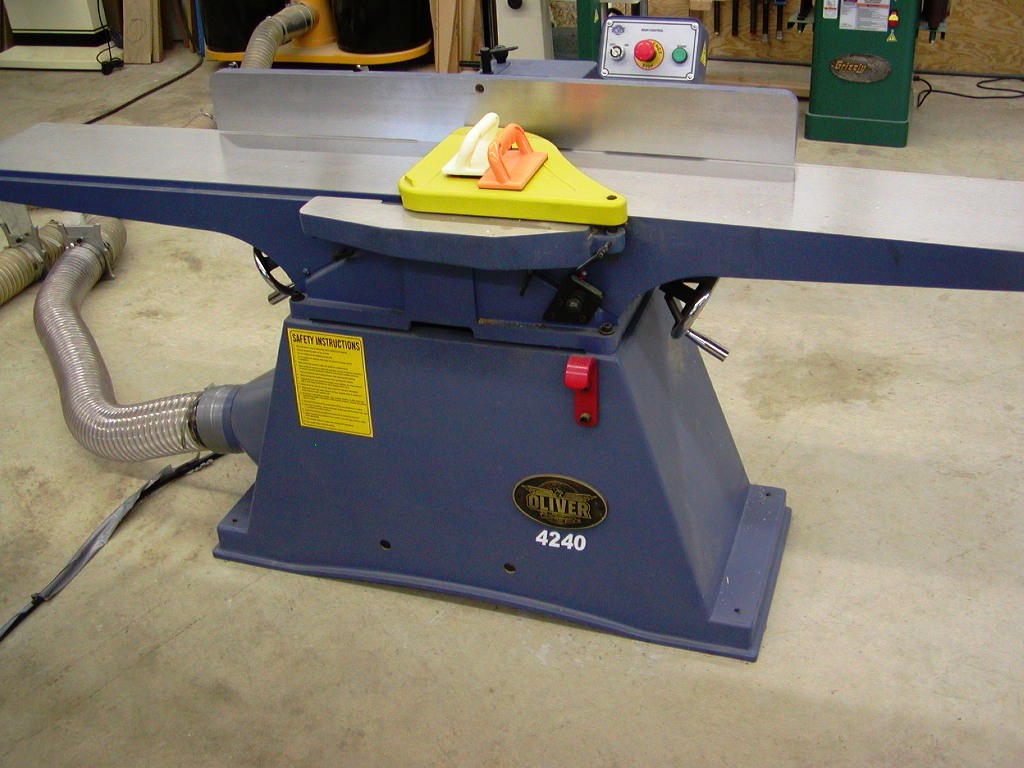
The second most-utilized power tool in my shop is the jointer andmy 10” Oliver 4240 jointer with a Byrd Spiral Cutterhead accomplishes most of my jointing needs. "10" I would consider the minimum size jointner, with at least a "60" bed.
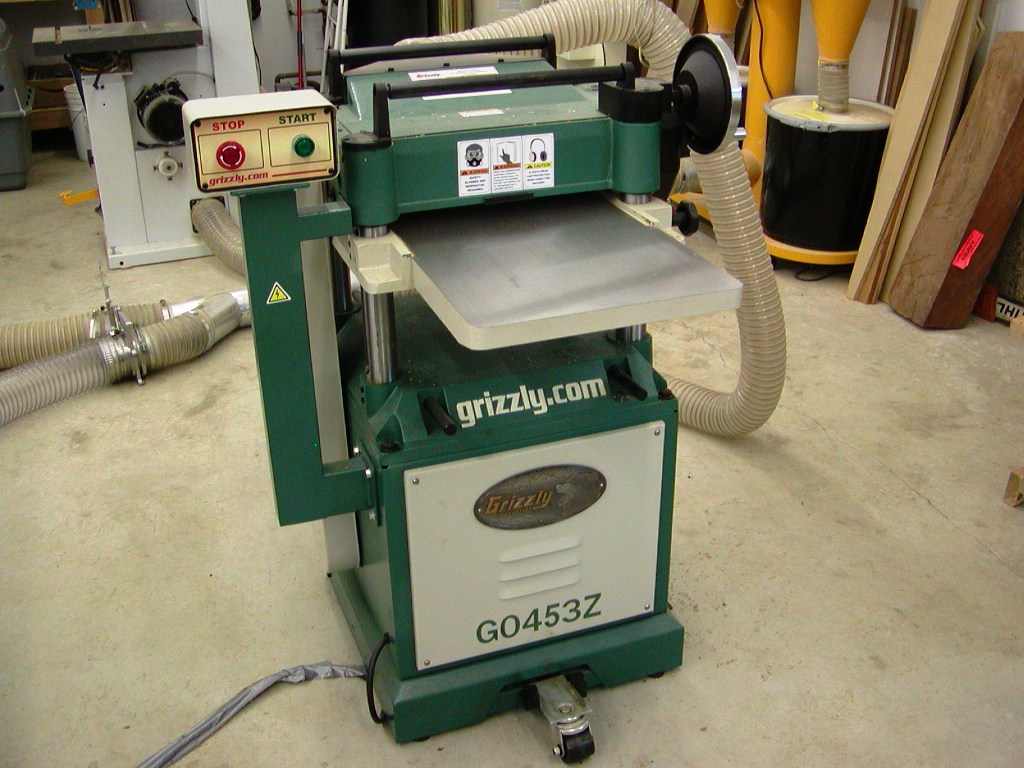

My Grizzly G0453Z 15” Planer, with a spiral cutterhead, is also a joy use and I’ve been very satisfied with its results. My Powermatic 719T Tilt Table Mortiser easily does all of my mortising. I upgraded to this from the model 701, which also works well, but the ease of adjustment on the 719T, with the moveable bed controls, make this model a joy to use. Whether cutting vertical or horizontal mortises in a leg or in a wide apron, setup is easy and the rock-solid bed holds the settings well.
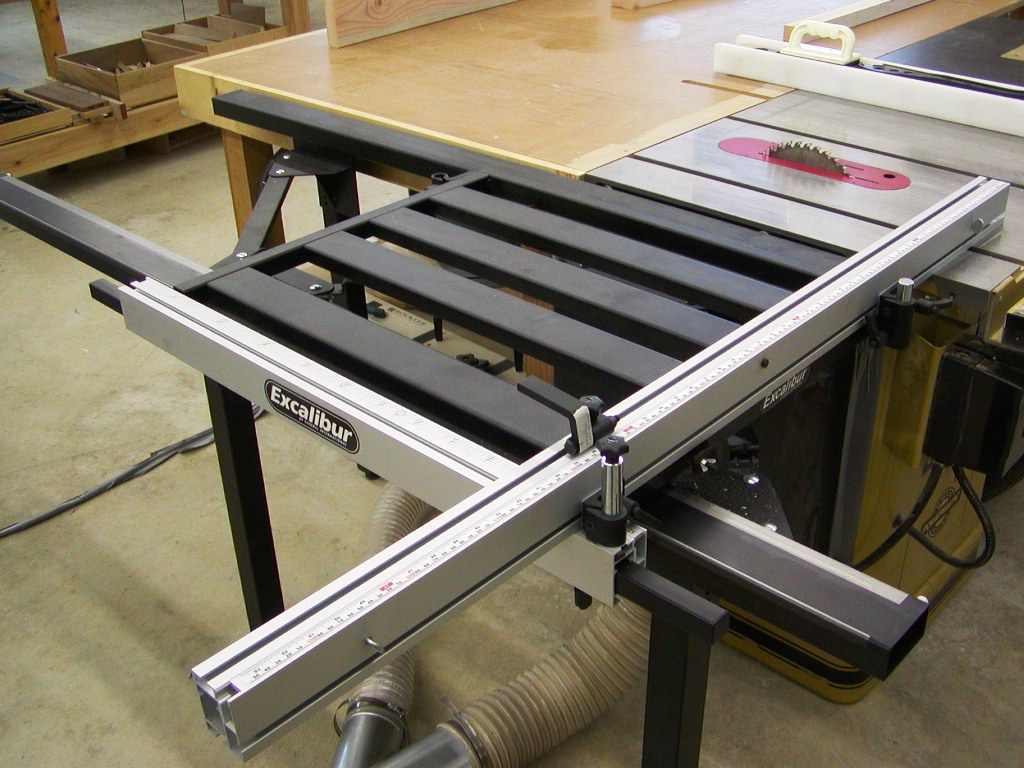
As I use my table saw with a Forest Dado Stack for cutting most of my tenons, I have attached an Excalibur Siding Table Extension to the end of the saw. This was not an easy tool to install. I had to modify several parts of the saw, including using a metal cutting saw to shorten the heavy duty angle iron and channel iron that support the saw's sliding fence. All in all, it took me about 2 days to get the extension installed and accurately adjusted to produce smooth and perfect cutoffs. I use the slider to get perfect cuts on pieces as small as a few inches, on up to several feet in length. It also allows me to conveniently slide the fence out of the way to rip wider boards or easily pivot the fence (on the post nearest to the saw table) to produce miters-- and then return it accurately by just twisting of a couple of knobs.
All of the machines are also connected to my Oneida dust collector, with only having to make a few gate adjustments when switching from one machine to another. The unit works well, providing plenty of suction to remove the chips and dust from the machines, but the filters are not easy to clean and the dust drums fill up quickly.
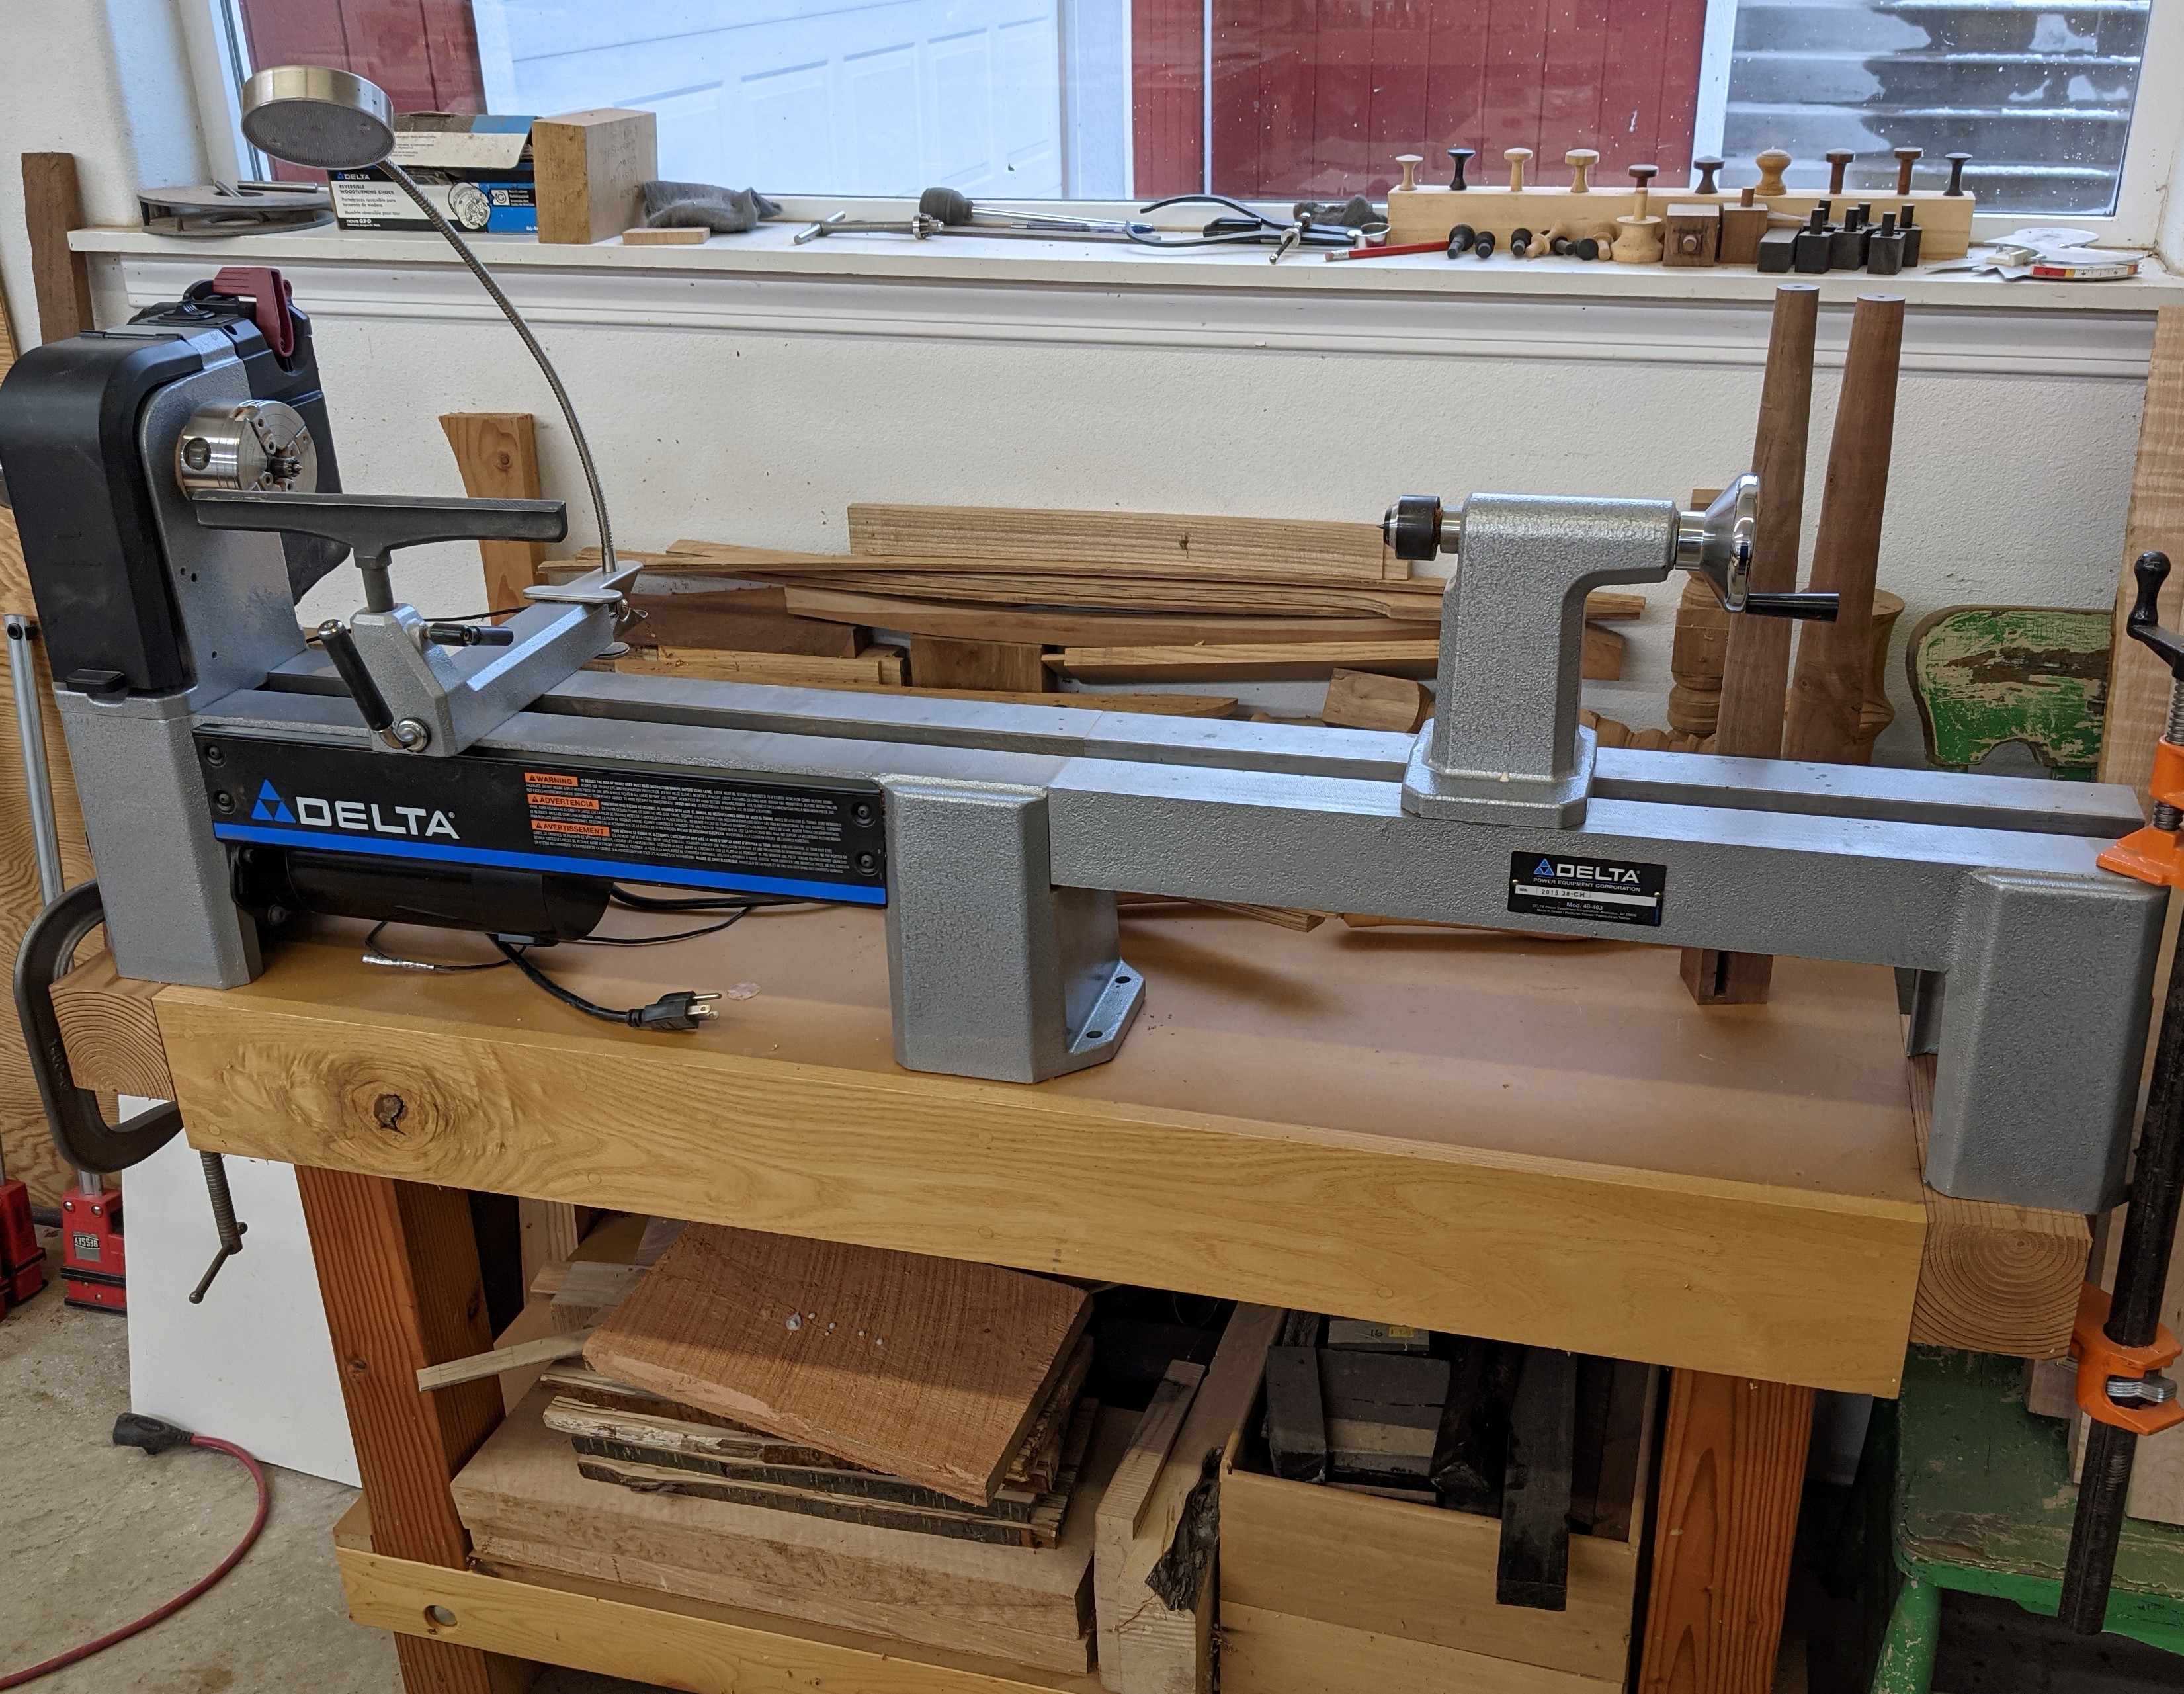
My Laguna 16 HD Band Saw has been adequate for my needs, for both cutting curves and resawing. Having a extra leaf from my Powermatic Table Saw after adding the sliding table extension, I attached the leaf to the side of the band saw to give me a comfortably-large surface for my tail board jig. My Delta 46-460 12 1/2" Variable-Speed lathe is mostly used to make custom knobs, but is also useful for turning legs. This is a really nice tool to use, being very smooth and easy to adjust the variable speeds by knob or changing the belt position. I added the NOVA chuck for turning knobs and it has worked flawlessly.
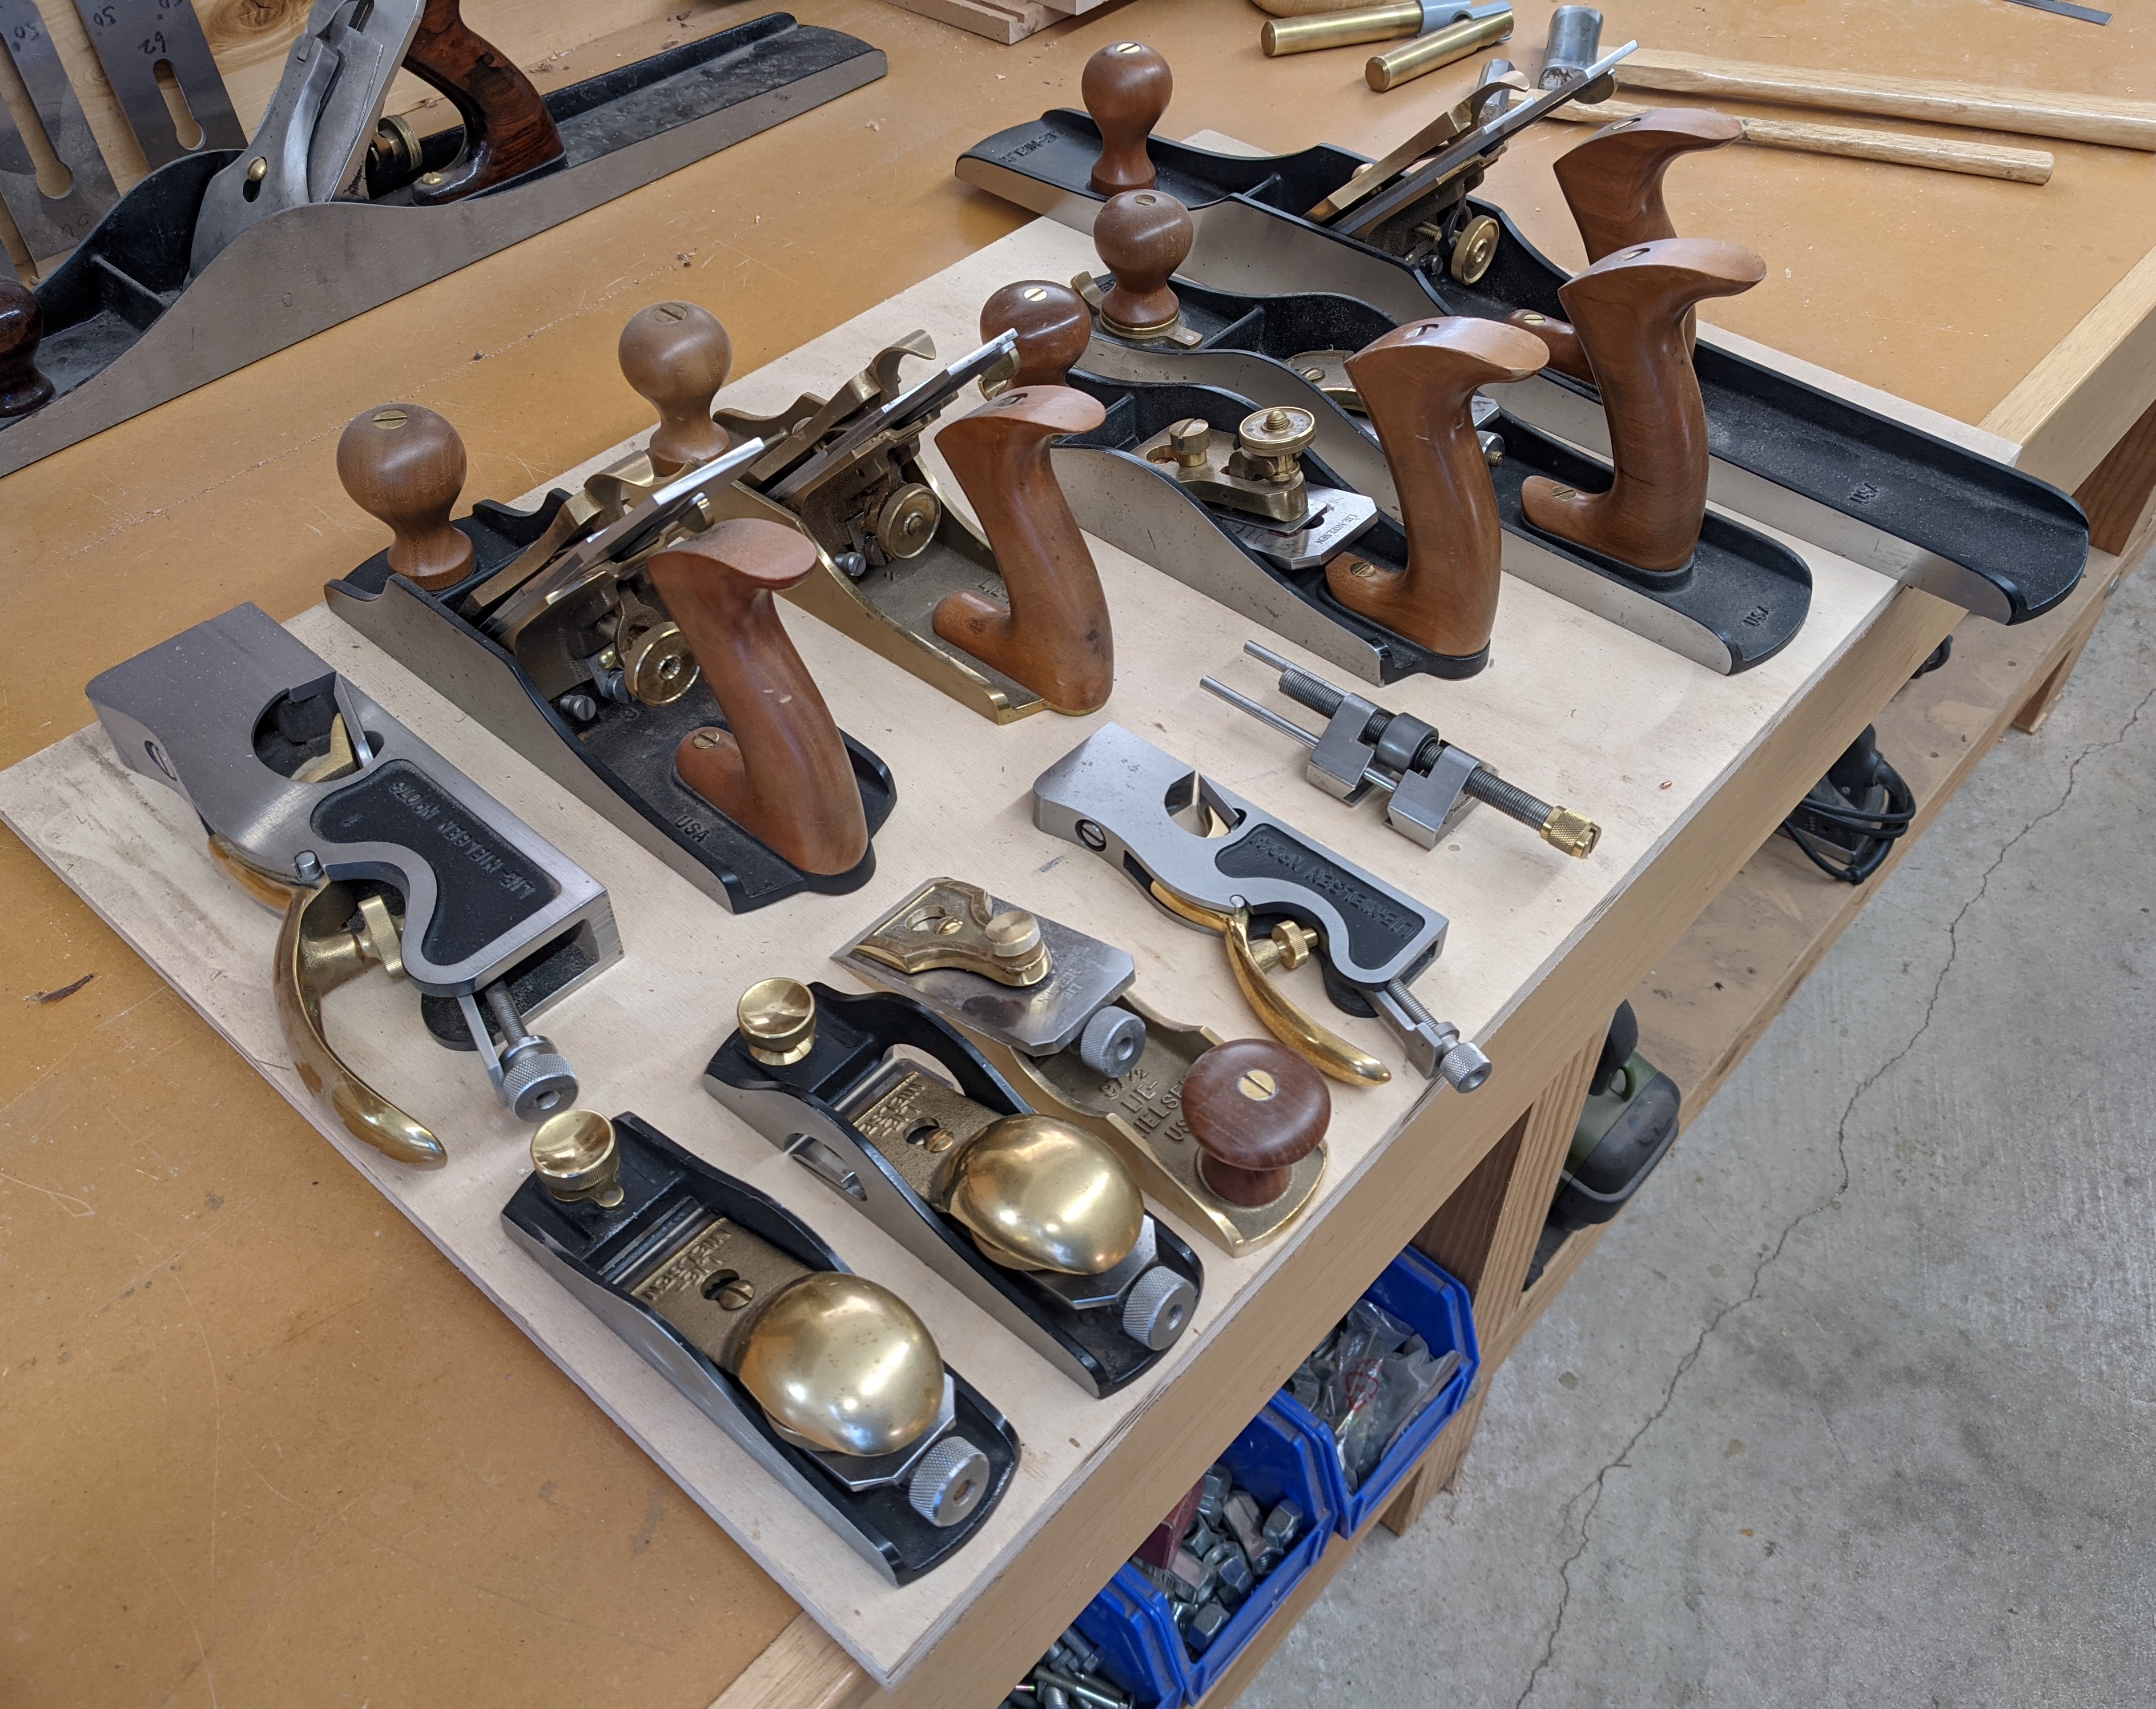
Using a sharp, high-quality hand plane to slice away micro-thin layers of a beautiful wood like cherry is a labor of love for me. Nothing quite reveals the true grain character of a species like the new surface exposed from a few strokes of perfectly-tuned plane. On the other hand using a dull, poorly made plane will only lead to frustration, cursing, and an endless amount of sanding. When I started accumulating my planes, I went for the best and have never looked back. Lie-Nielson is one of those rarities anymore—a purely American manufacturing company whose focus on making the highest quality hand tools possible has never wavered. Yes, a bit more of an investment money wise, but the reality is that I don’t need a large number of planes—- just a few can get most of the work done.
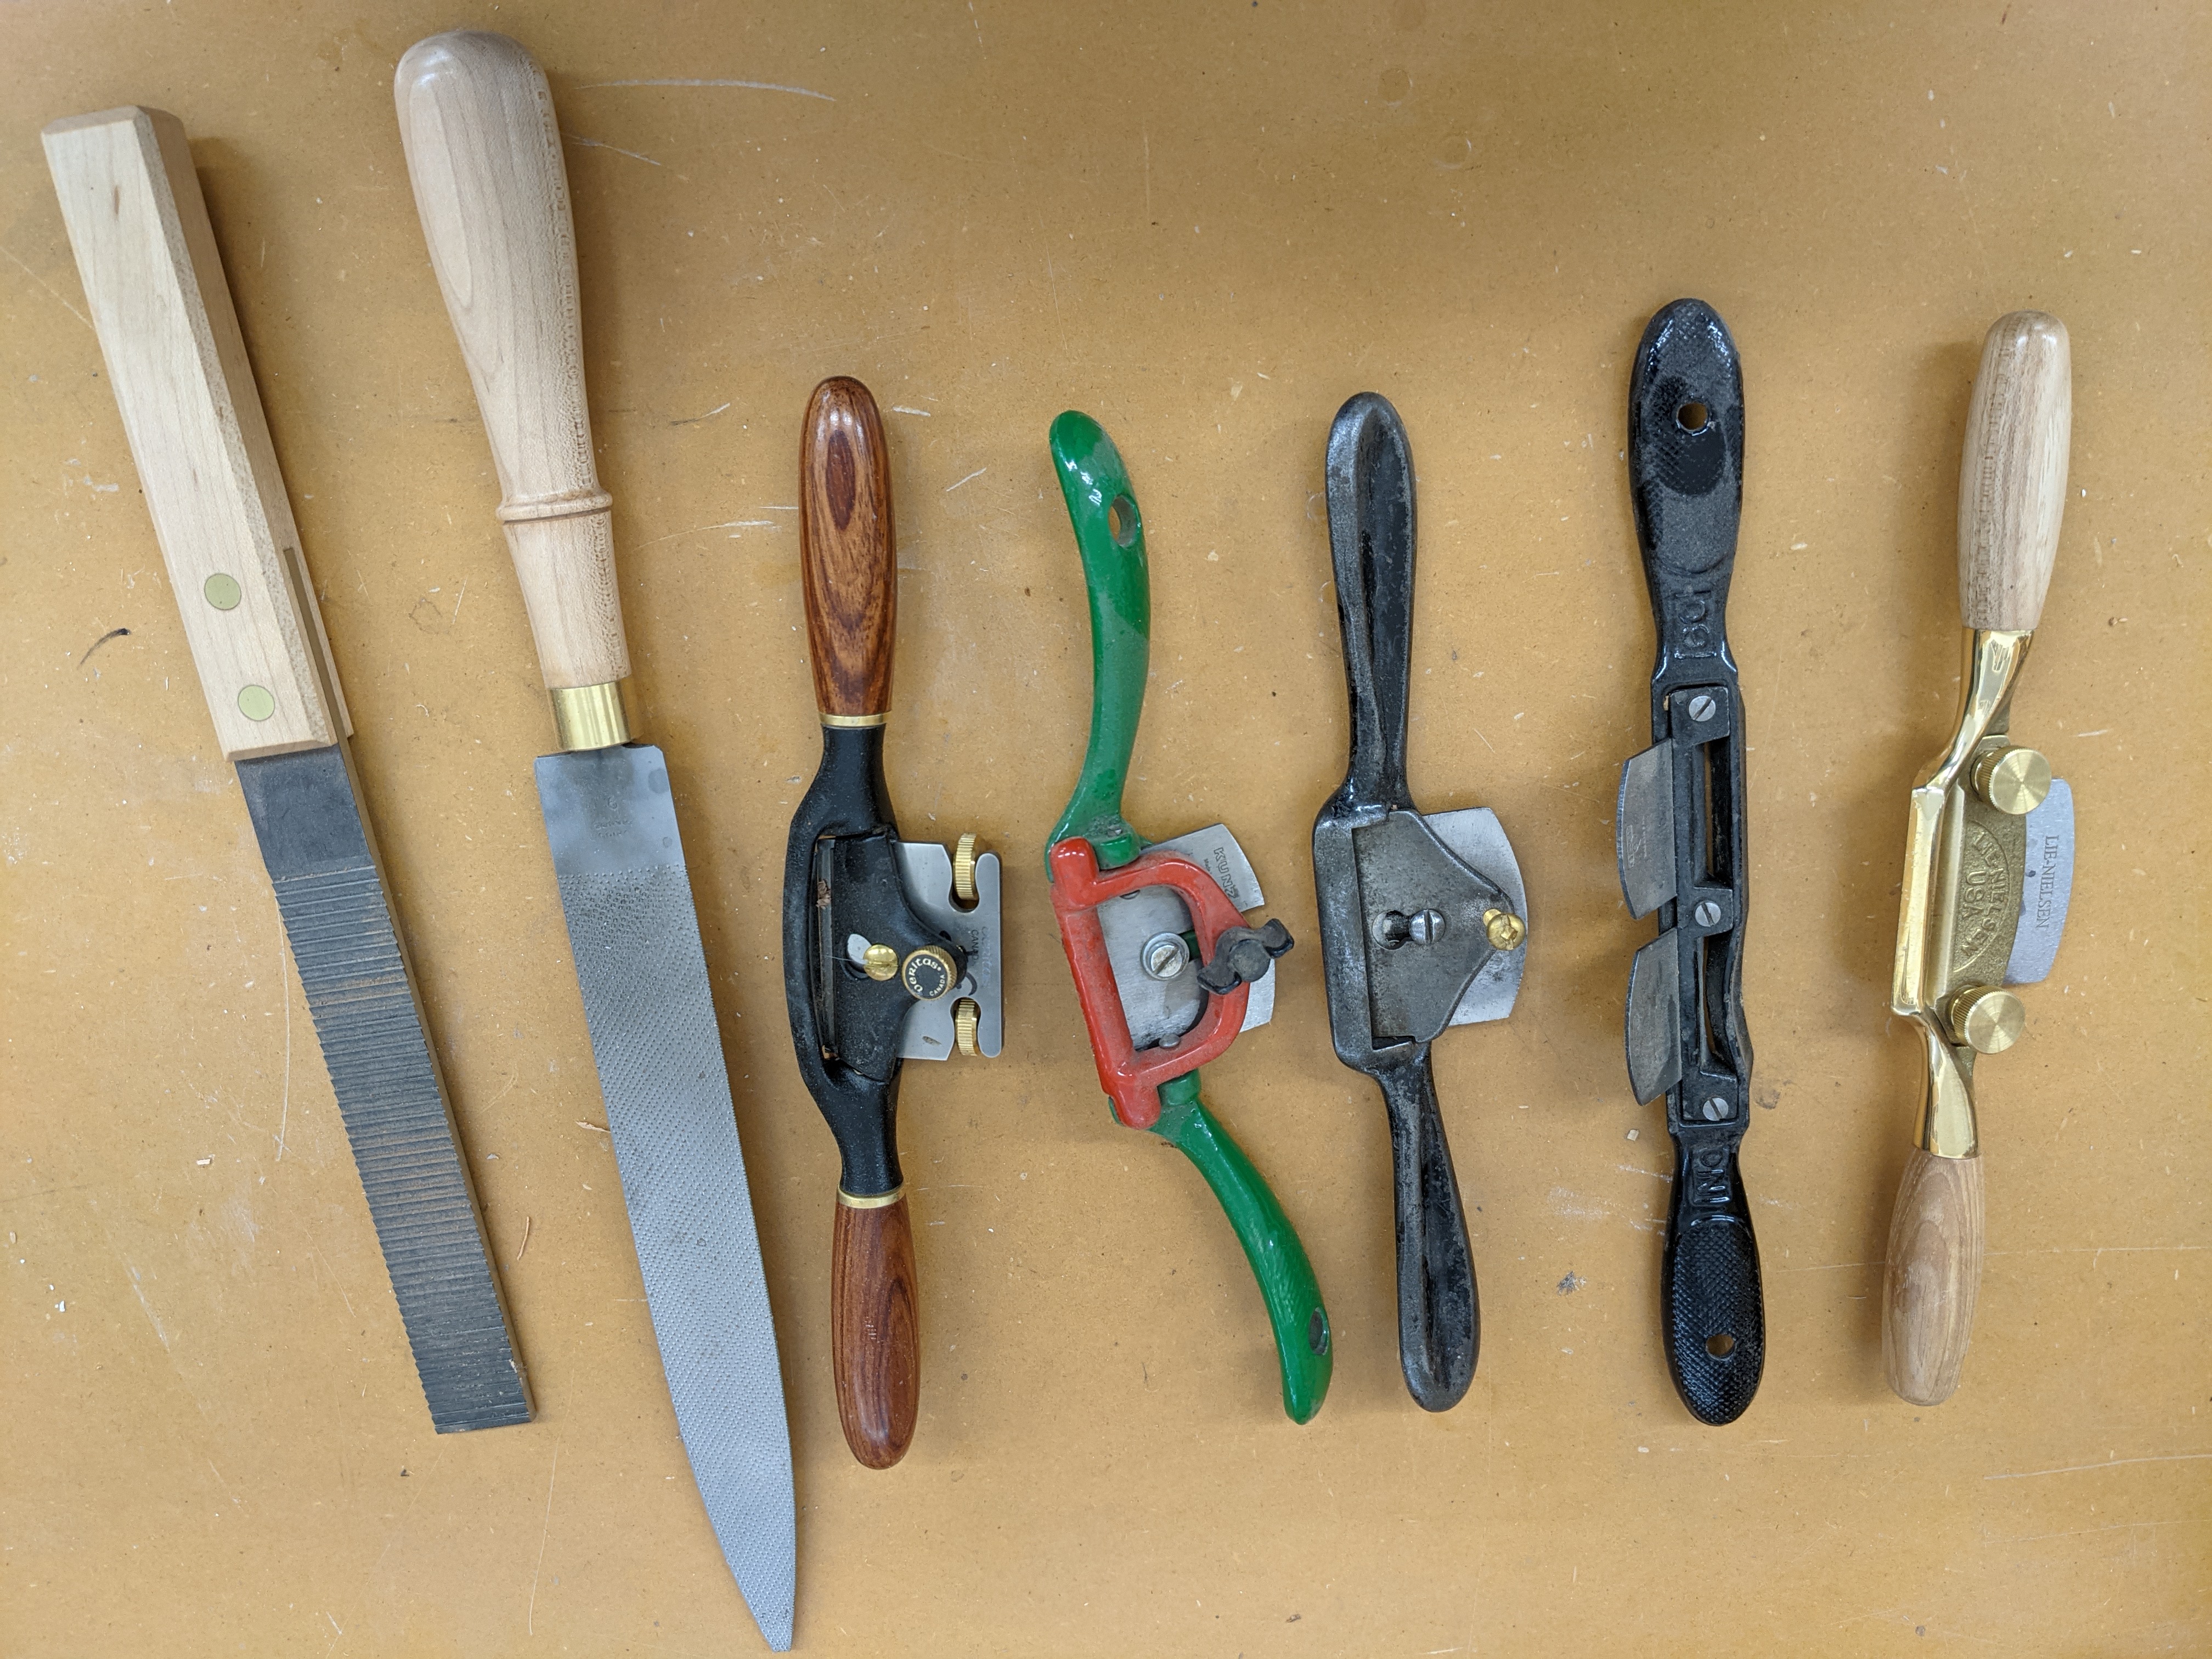
Doing chairs and arcs on aprons requires good spokeshaves. Although I own an oscillating rotary sander, I much prefer a sharp spokeshave to smooth out the curves. The Lie-Nielson with a curved sole gets most of the work, but I use all of the shaves for various tasks.
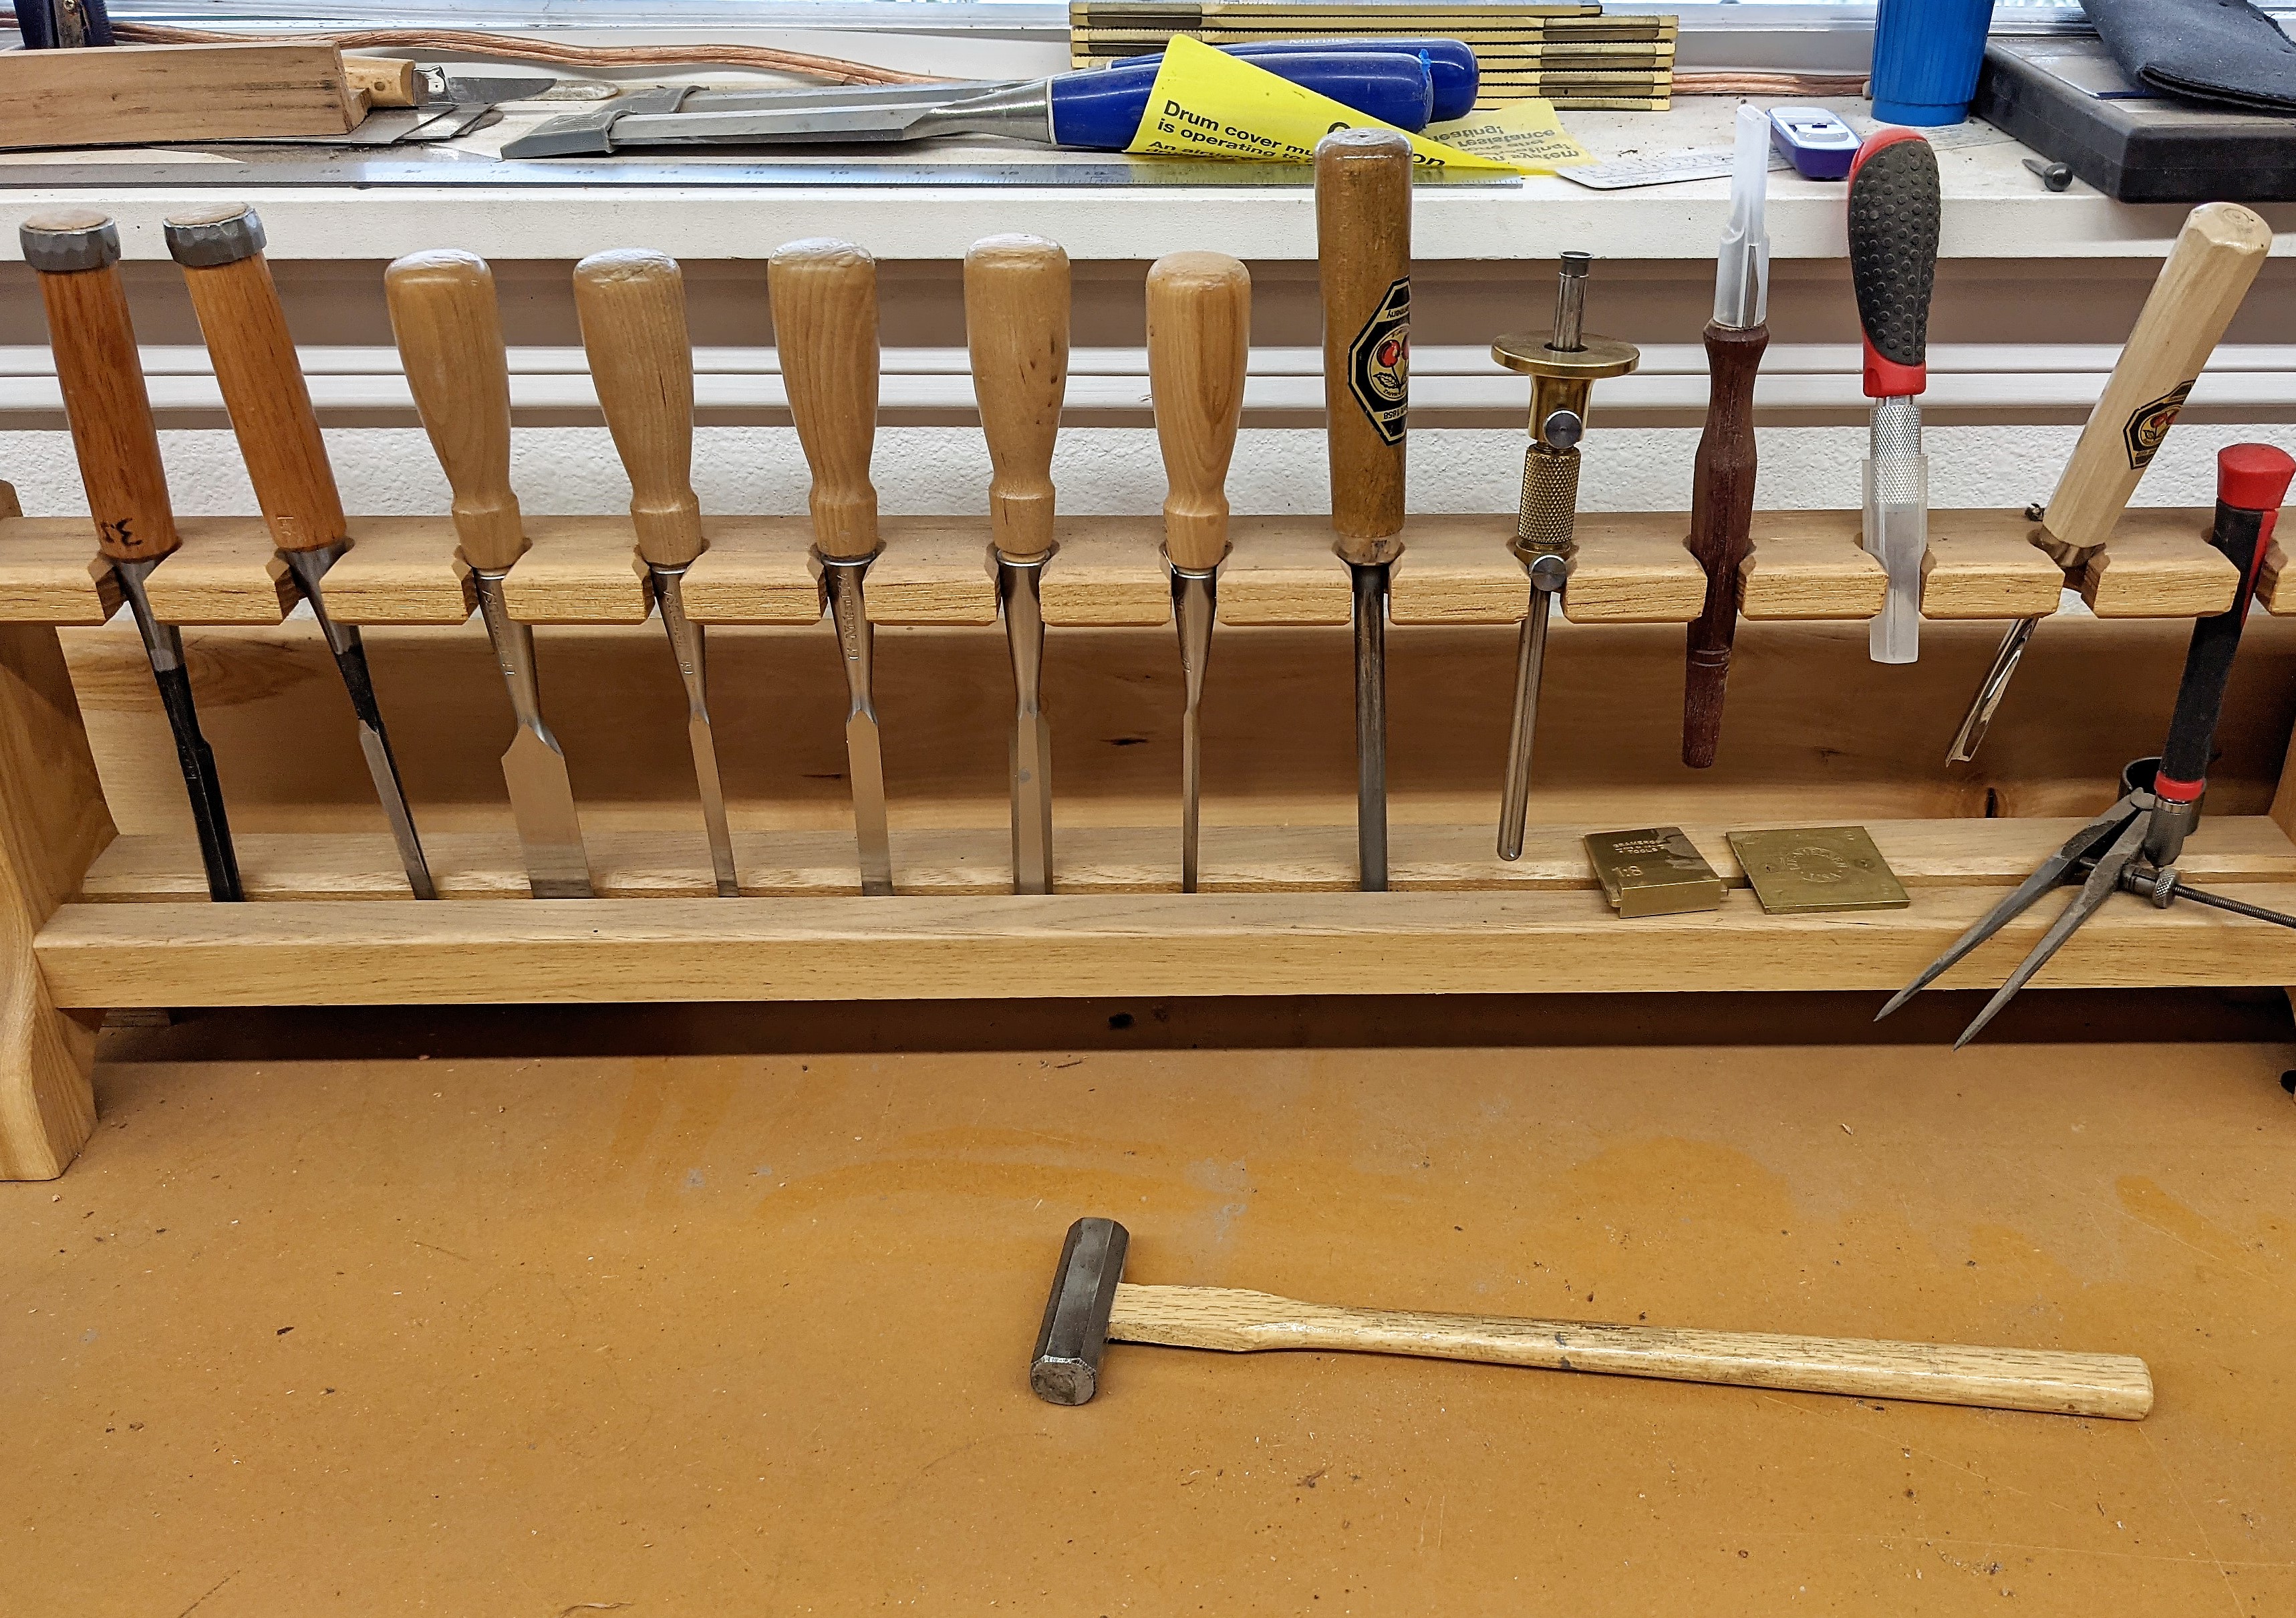
My Lie-Nielson chisels are also a treasure to work with. The sides of the these chisels are ground at a single bevel, as compared to the compound bevel on most others. This makes them especially useful for doing the close-in work of hand-cut dovetails. I also like the feel and balance of the smooth hornbeam handles. I have a few Japanese Chisels and while they hold an edge wonderfully, but are not the easiest to sharpen. Lie-Nielson makes a sharpening jig to hold their plane blades and chisels at the correct angle over the waterstones. That simplifies sharpening considerably.
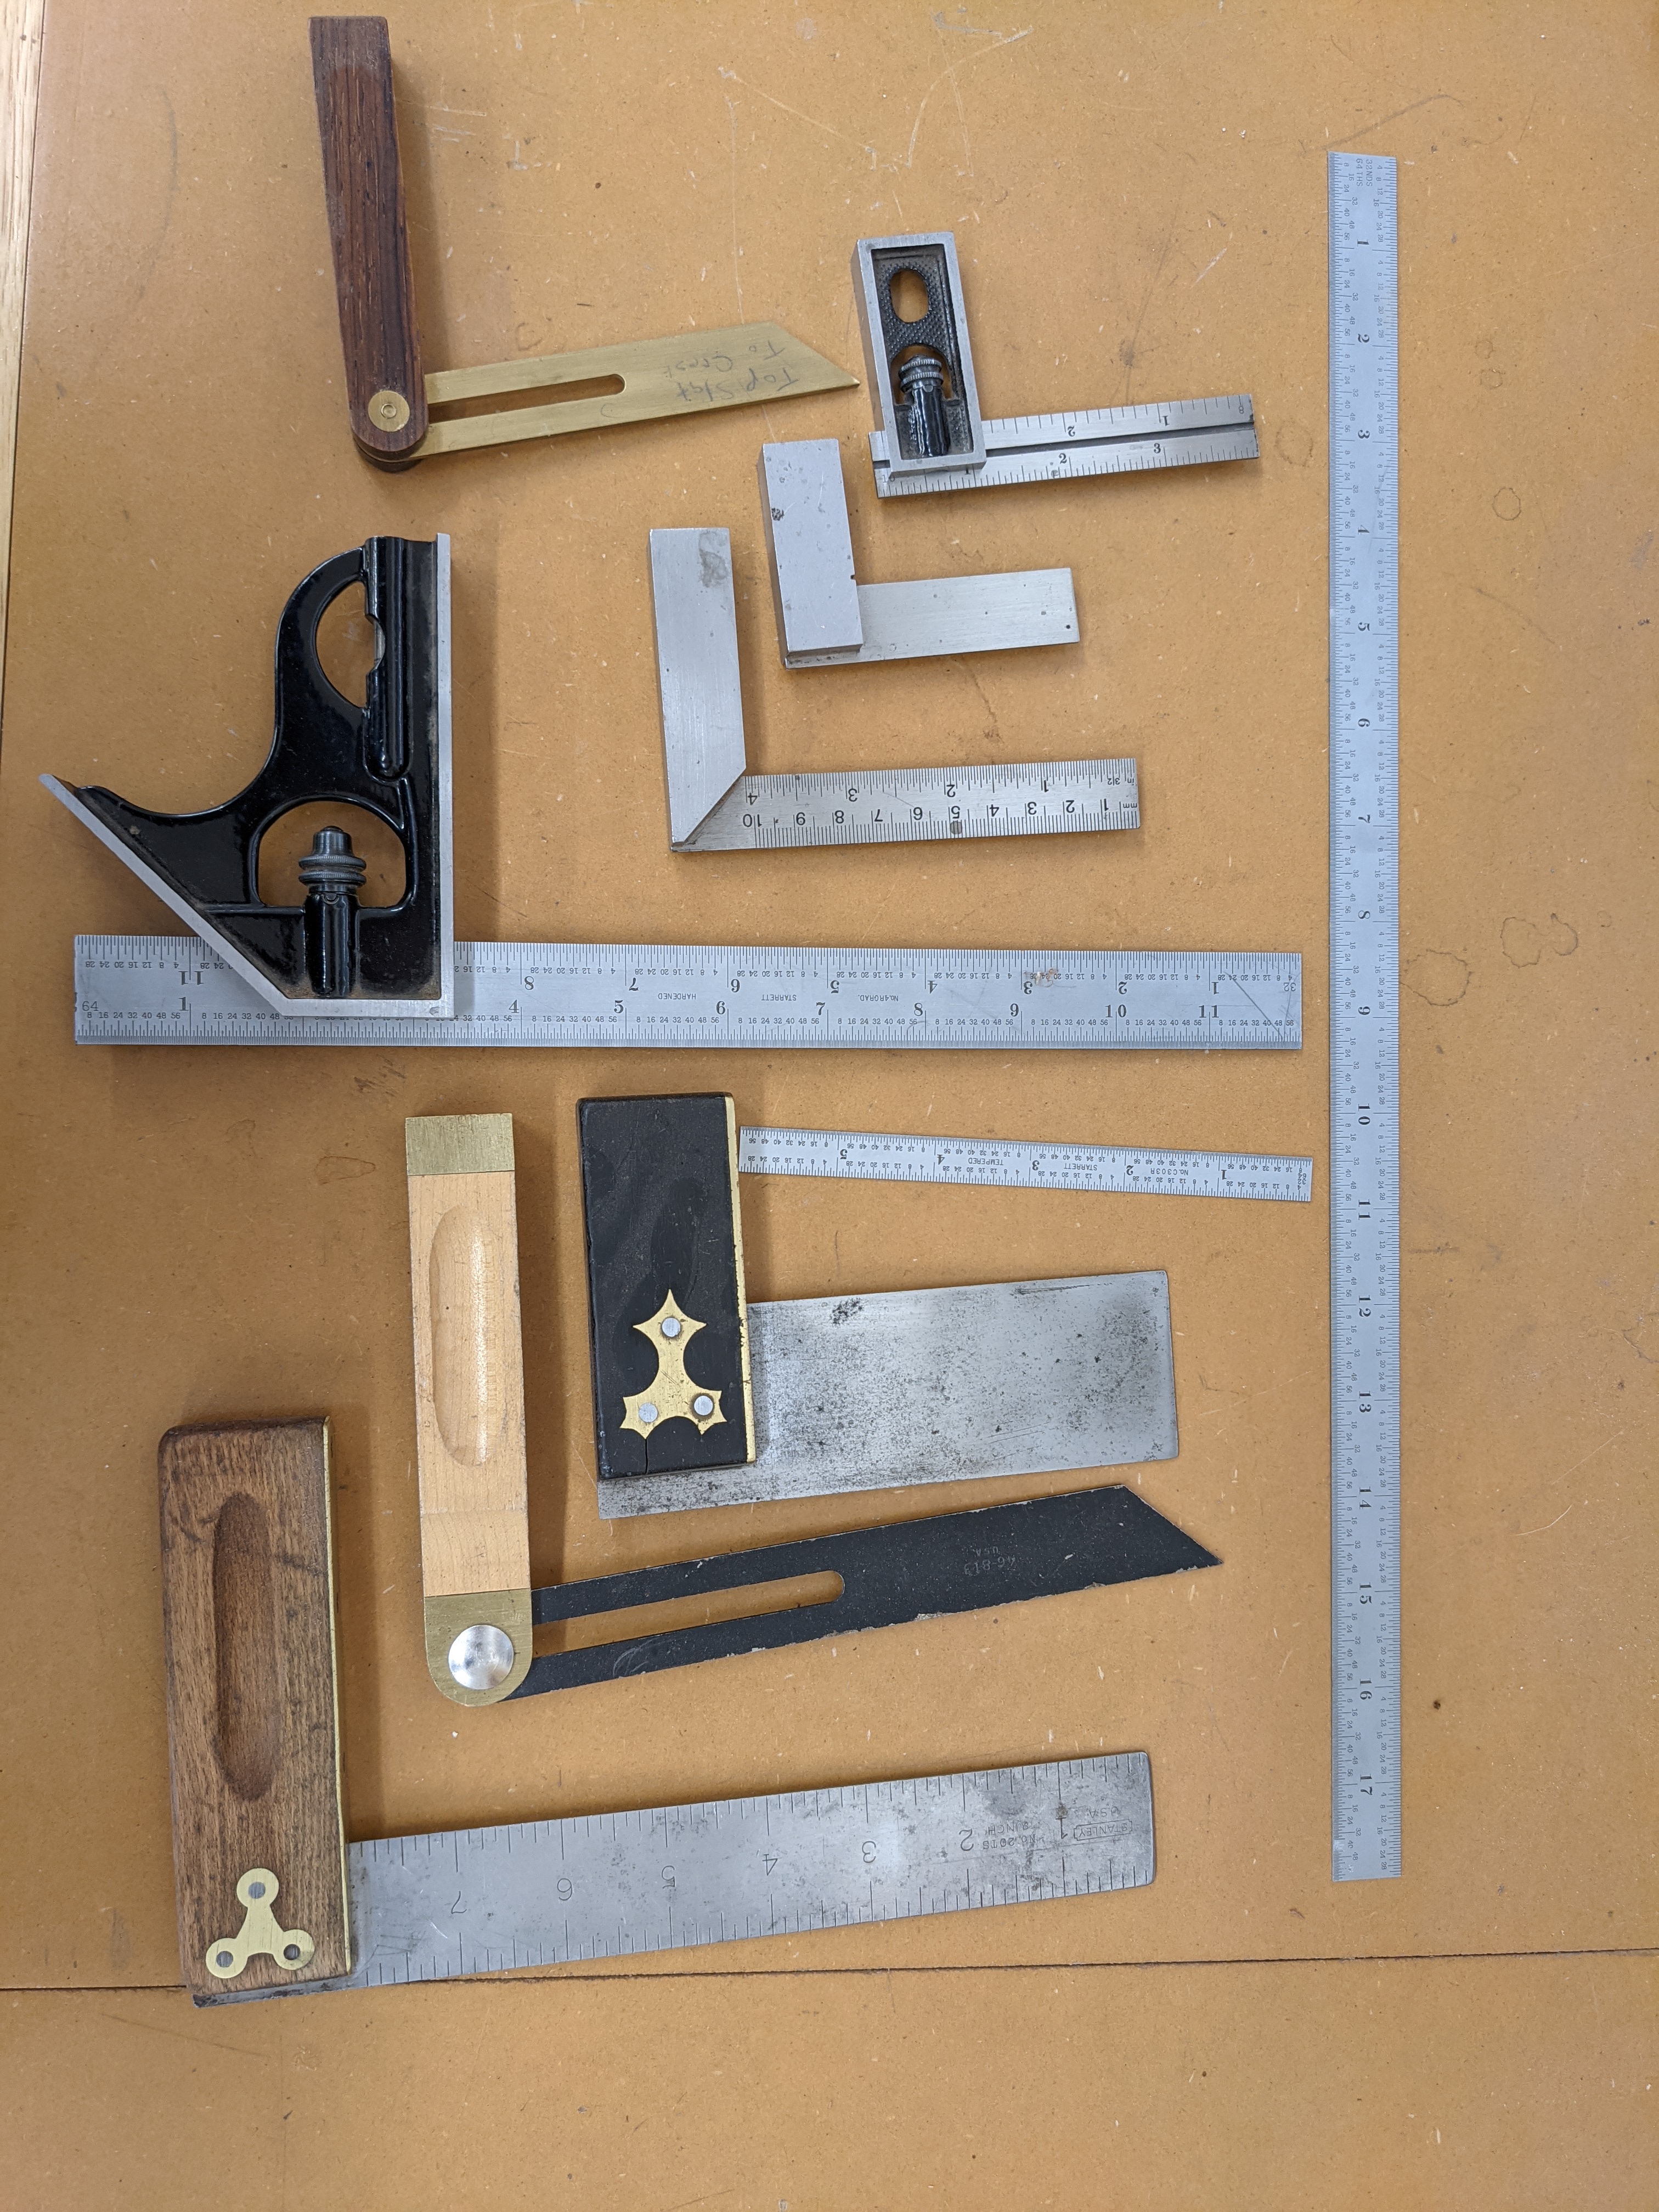
Hand work at the bench also involves a variety of rules, squares, marking gauges, files and rasps. Adjustable combination squares are especially useful for layout work. Rules enable accurate, reproducible measurements in circumstances that tape measures can be cumbersome.
Back To Top Home