Posted September 1, 2013

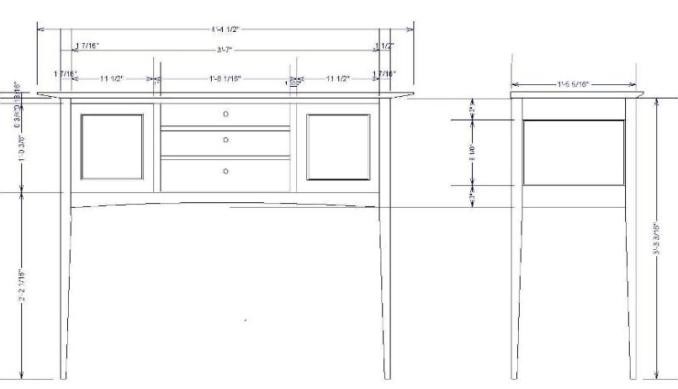
Garrett’s Hack's Huntboard (FWW #187), is a much-built piece by many woodworkers in a variety of styles. Except for a few modifications to suit my skill level and taste, I followed Garrett’s dimensions, his proportions are graceful and well suited. There is a lot of joinery in this piece, and seasonal wood-movement must be carefully considered for most of that joinery. He deals cleverly with this on the sides and back by doing a 3-part construction, with the center panel a sold piece running horizontally with the aprons, but only connected loosely with non-glued splines to hold it all together. I preferred the more traditional look of panels running vertical to the aprons, with appropriate spacing and gluing to deal with the wood movement. I also chose to make the front rail with a concave arc, as opposed to his convex arc, and to connect the rail to the bottom board with biscuits.

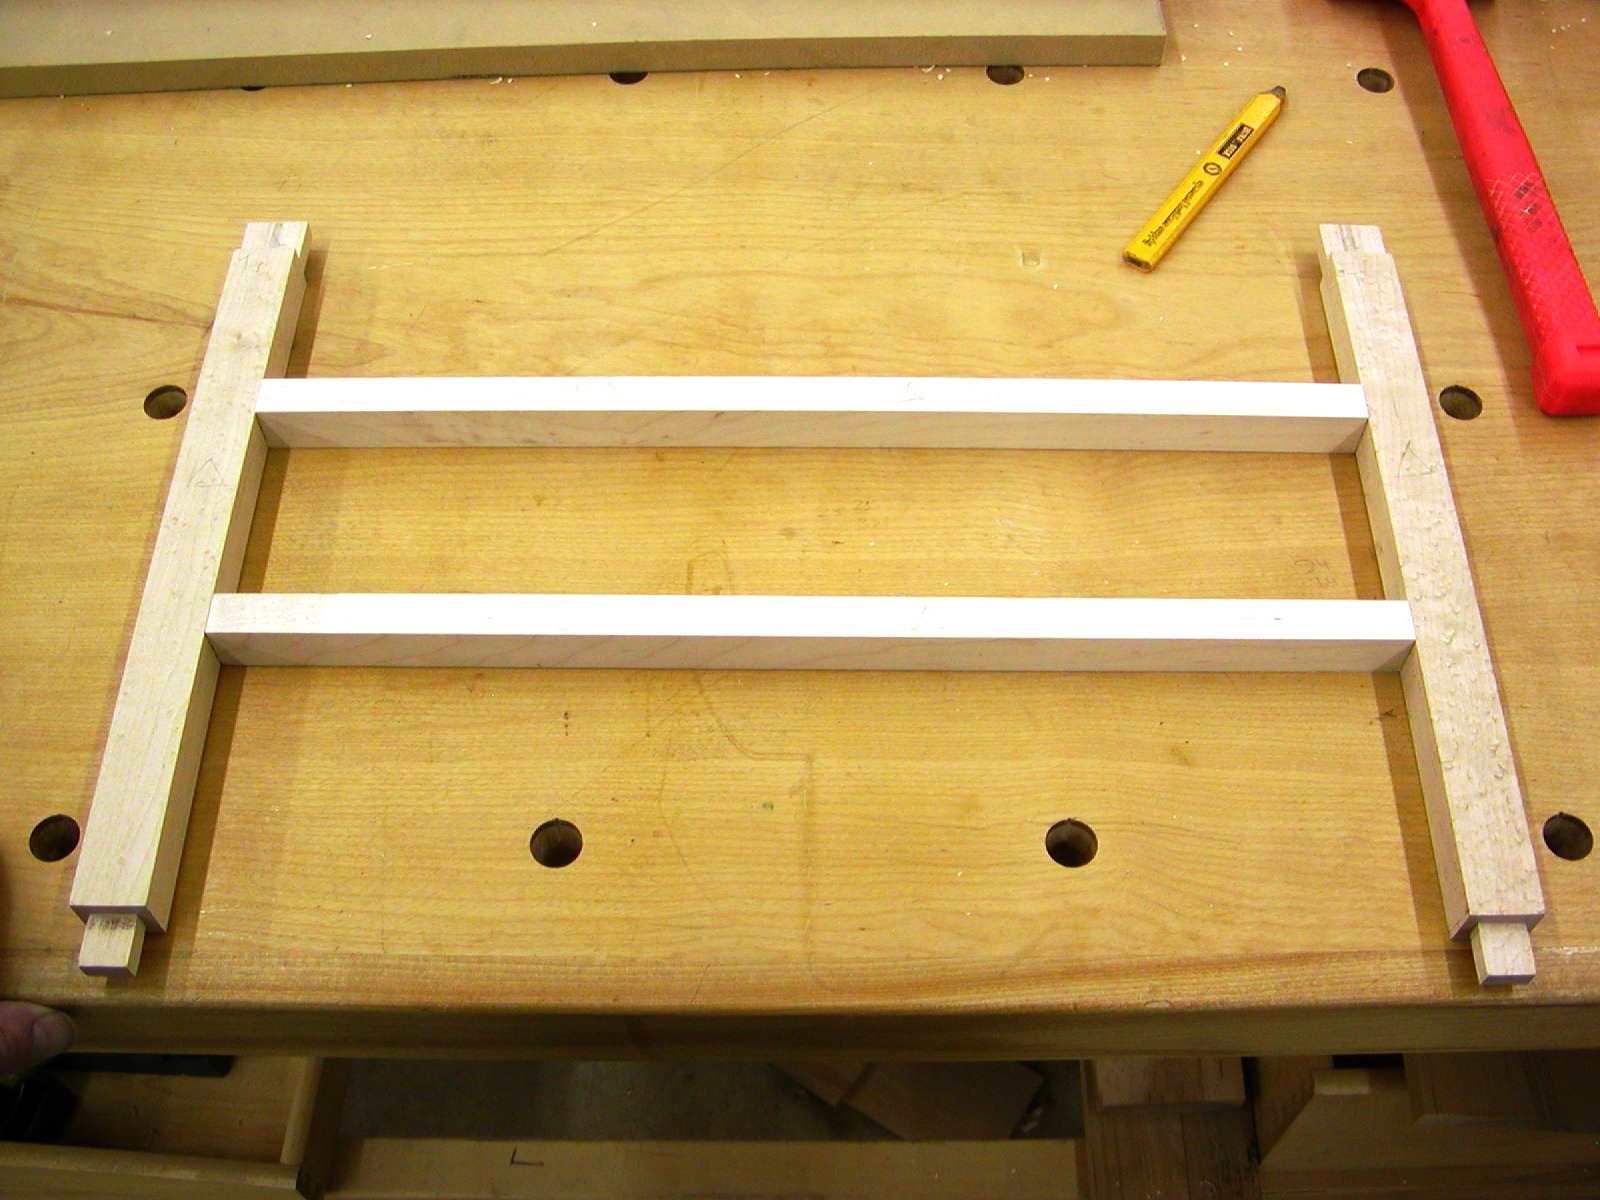
My project will be made with bird’s eye maple for most of the case and, to add some contrast, cherry for the door panels and drawer fronts. These photos show the mortise and tenon joinery for the ends and how I dadoed the side and back lower apron to accept the rabbited edge of the bottom piece. The bottom will be glued in the center of each side, but not in the back to allow the rather large piece of maple to seasonally move in and out of the back dado.

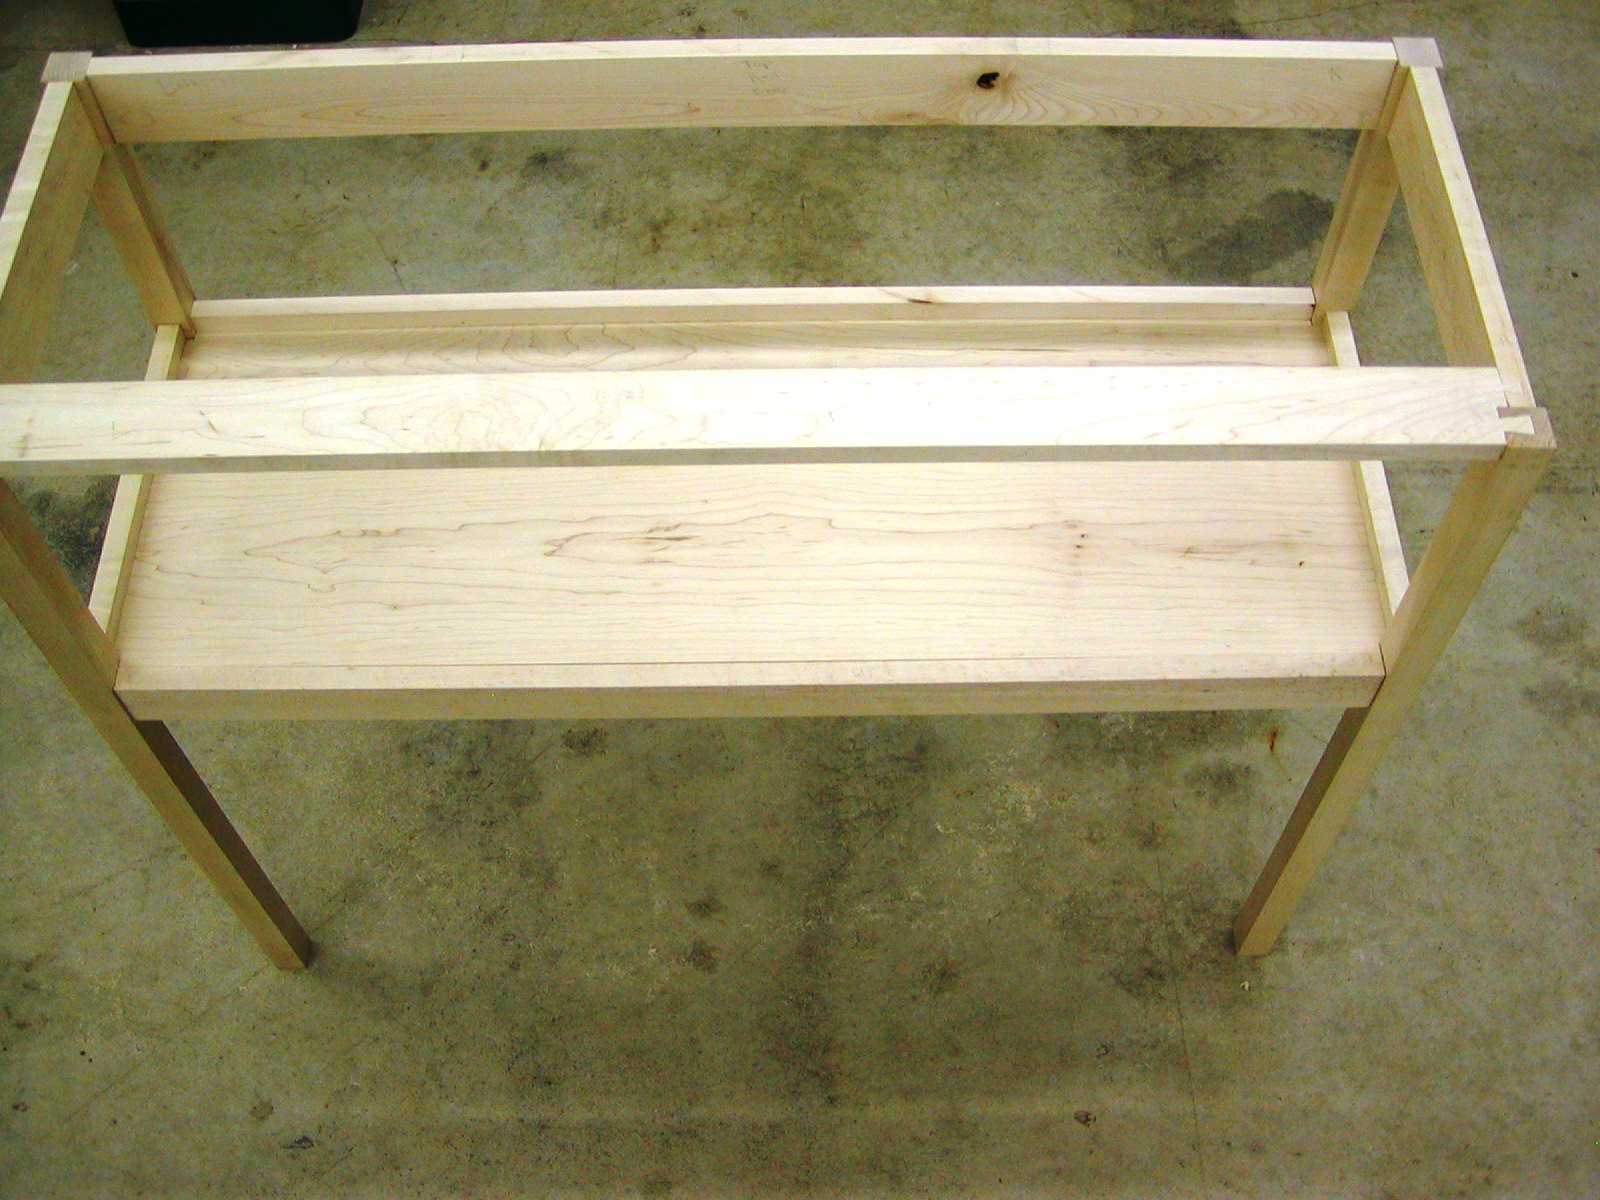
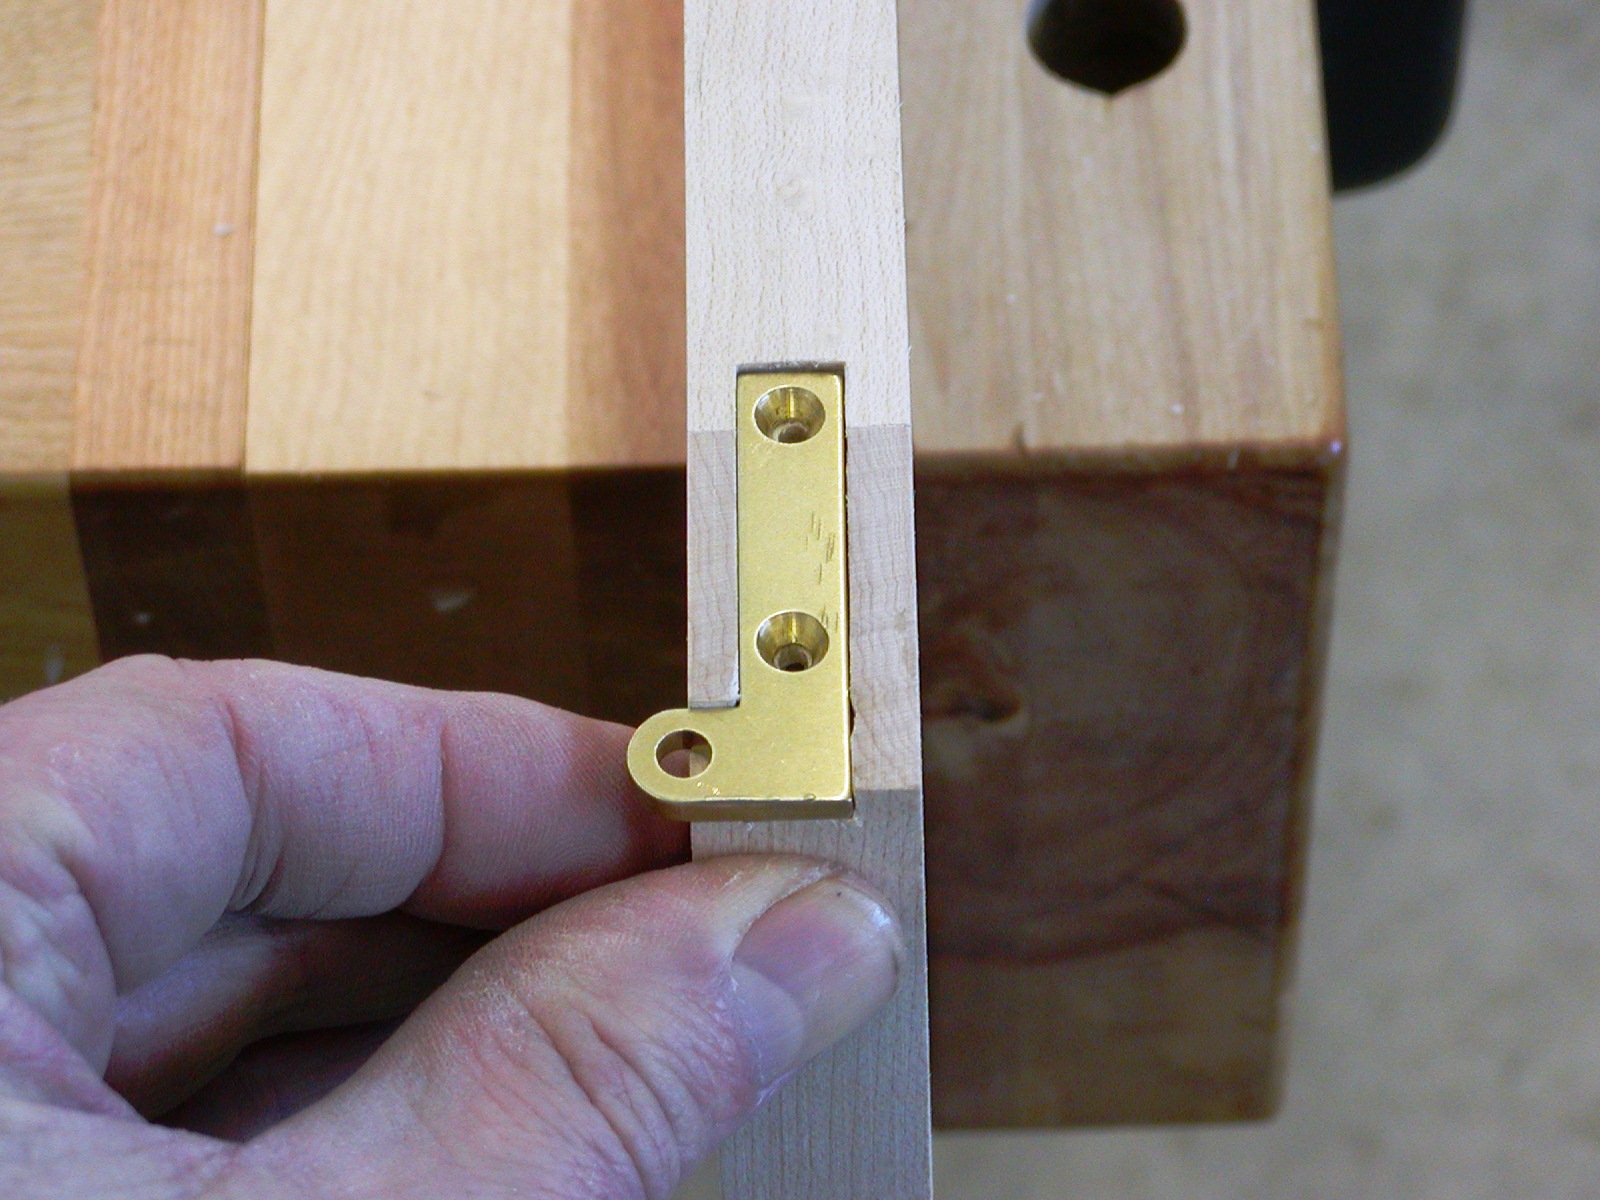
The front stretcher is critical to strengthening the case and is one of the more difficult and time-consuming pieces to construct (notice the drop of blood on the leg end!). Although the joints won’t be seen on the finished case, having them fit tightly will add to the sturdiness of its construction. The front lower apron and stretcher ends are then mortised to accept the knife hinges to swing the doors. And finally, the lower apron is biscuted to the case bottom edge for ease and strength in assembly. Next the end and side panels are glued up and rabbited with my router lift. The top and bottom aprons, as well as the legs, are then dadoed to accept the panels. I added two additional vertical stiles to the back piece to avoid having to use exceptionally large panels. The case ends and back are glued up separately to simplify case assembly.

Early January and we are all feeling the close companionship of our wood stoves. Indeed, chopping kindling and hauling firewood comprise the majority of our few available outdoor activities this time of year. However, after a pause for the holidays, it’s a great time for hunkering down to work in a warm work shop. All of the various pieces of the hunt board (and there are many of them) are finally coming together for final case glue up. I have designed the construction process to glue up the case separately as a unit and then add in the drawer-divider frame assembly as a separate piece. Case glue-ups are stressful enough for me, so I’m hoping this two-step process will offer some relief from that stress, while still maintaining the integrity of the finished product.

I begin the assembly with double-tenoning the blades into the front stiles, which themselves have been tenoned to fit into the corresponding mortises in the top stretcher and bottom front apron.The stiles are biscuted to the ends of the case divider (this adds strength and significantly adds to ease of assembly). The other advantage of biscuits is that they can be spaced so as not to interfere with the blade mortise and tenon joinery. Next the drawer runners are tenoned into the back of the blades where they meet with the stiles. The runners will be glued to the sides of the case dividers, but only near the front so as to allow the dividers to seasonally expand (as they, like everything else in this project, are solid maple).

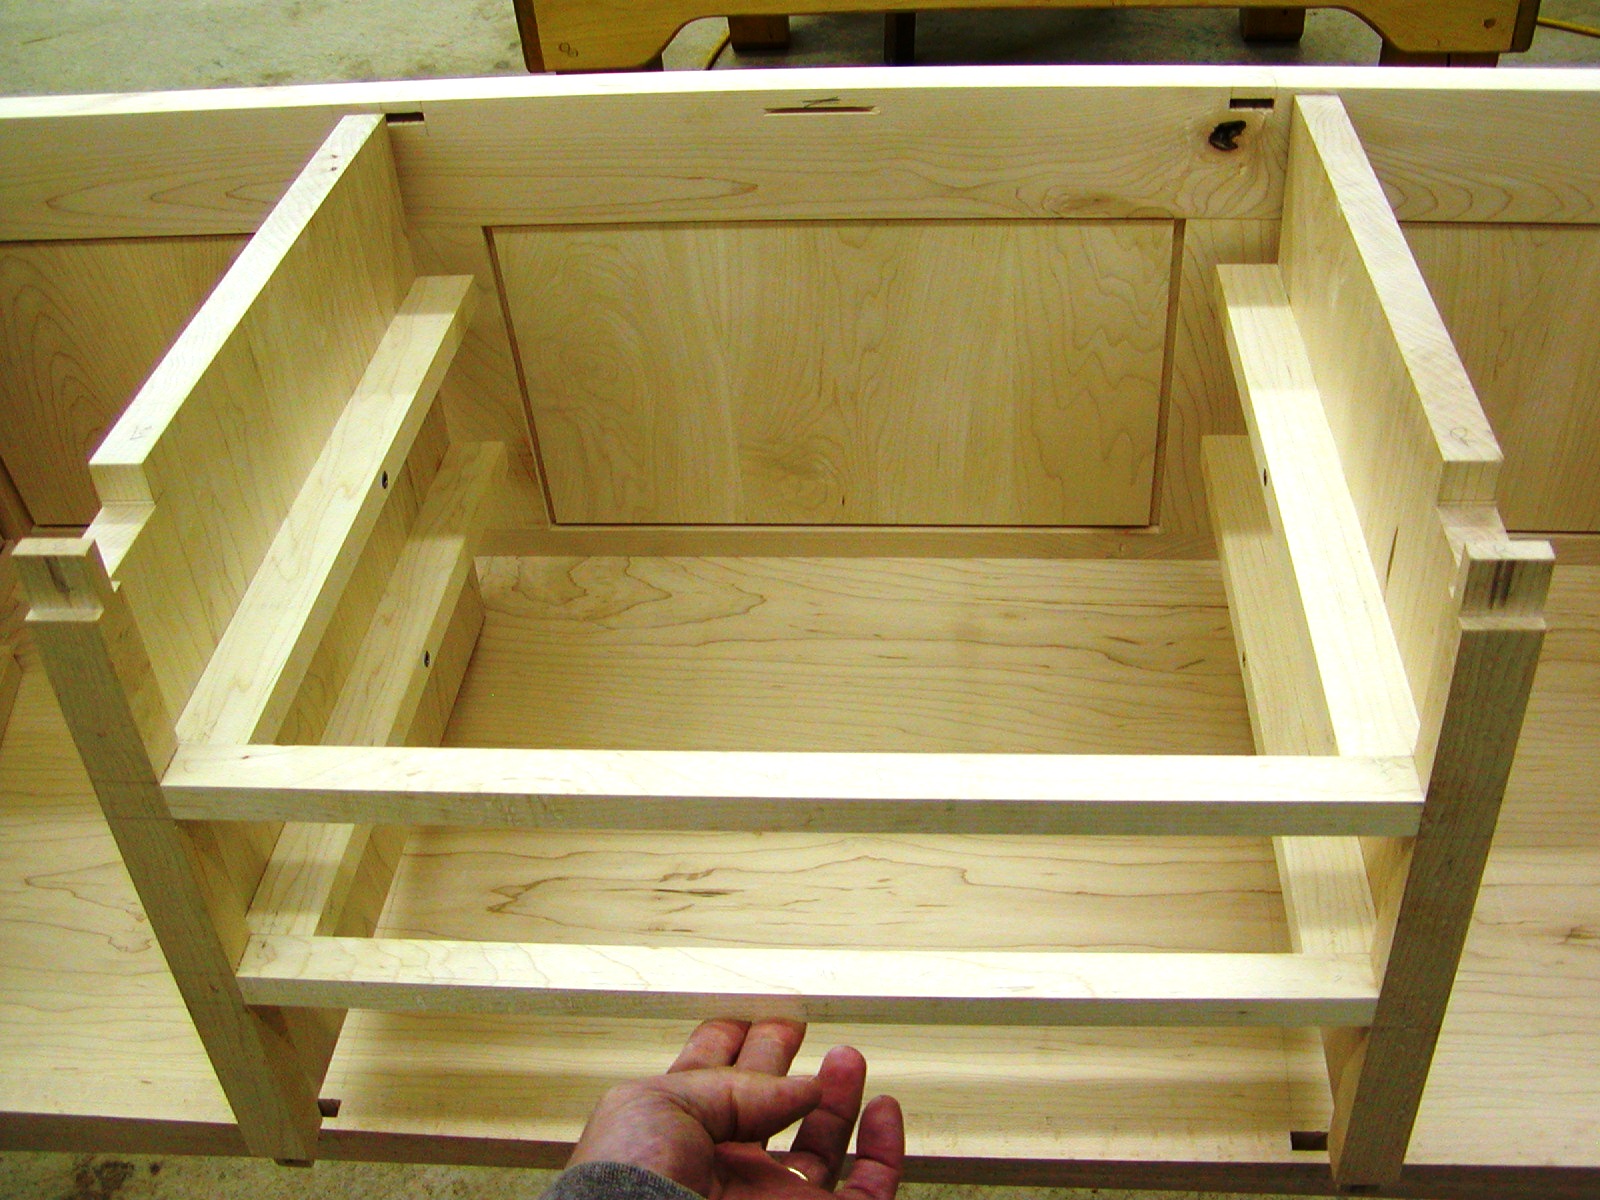
The entire drawer-runner-divider assembly is then glued-up as a separate entity. If everything is done right, it will fit perfectly into the mortises in the bottom rail and top stretcher.


The top kickers are mortised into both the top stretcher and the back upper apron. This gives the finished case a great deal of rigidity. Finally, the entire drawer entity is glued into the case, starting with the bottom apron mortises, and then adding the top kickers and stretcher. I also added a couple of screws from the case bottom up into the dividers (near the front, so the rear can expand). As can be seen from the photo, the dividers stop short of the back of the case, in order to allow for seasonal movement, but the top kickers attach to the back. I also check everything for square before applying the full pressure of the clamps.
Often, just before the completion of a lengthy project, I grow impatient with looking at the piece in my shop and just wish it was finished. I’m eager to move on to the ‘real woodworking’ (i.e.; cutting, sawing, planning, and fitting joinery) of the next project and to be done with the more tedious tasks of sanding, applying finishes, fitting doors and drawers, fine-tuning the hardware, etc of the current piece. Of course, this is when the woodworker’s attentions need to be most focused, as it is the above mentioned tasks that can dramatically affect the quality of the finished piece. I’ve found that, if some of these loathsome tasks can be addressed while the project is underway earlier, such as sanding pieces before glue-up and closely fitting the hinges and other hardware as the piece is constructed, then things go easier and smoother at the end. The final stages of the Hunt board were relatively painless, mostly as a result of trying to be proactive with these things during the construction phases.

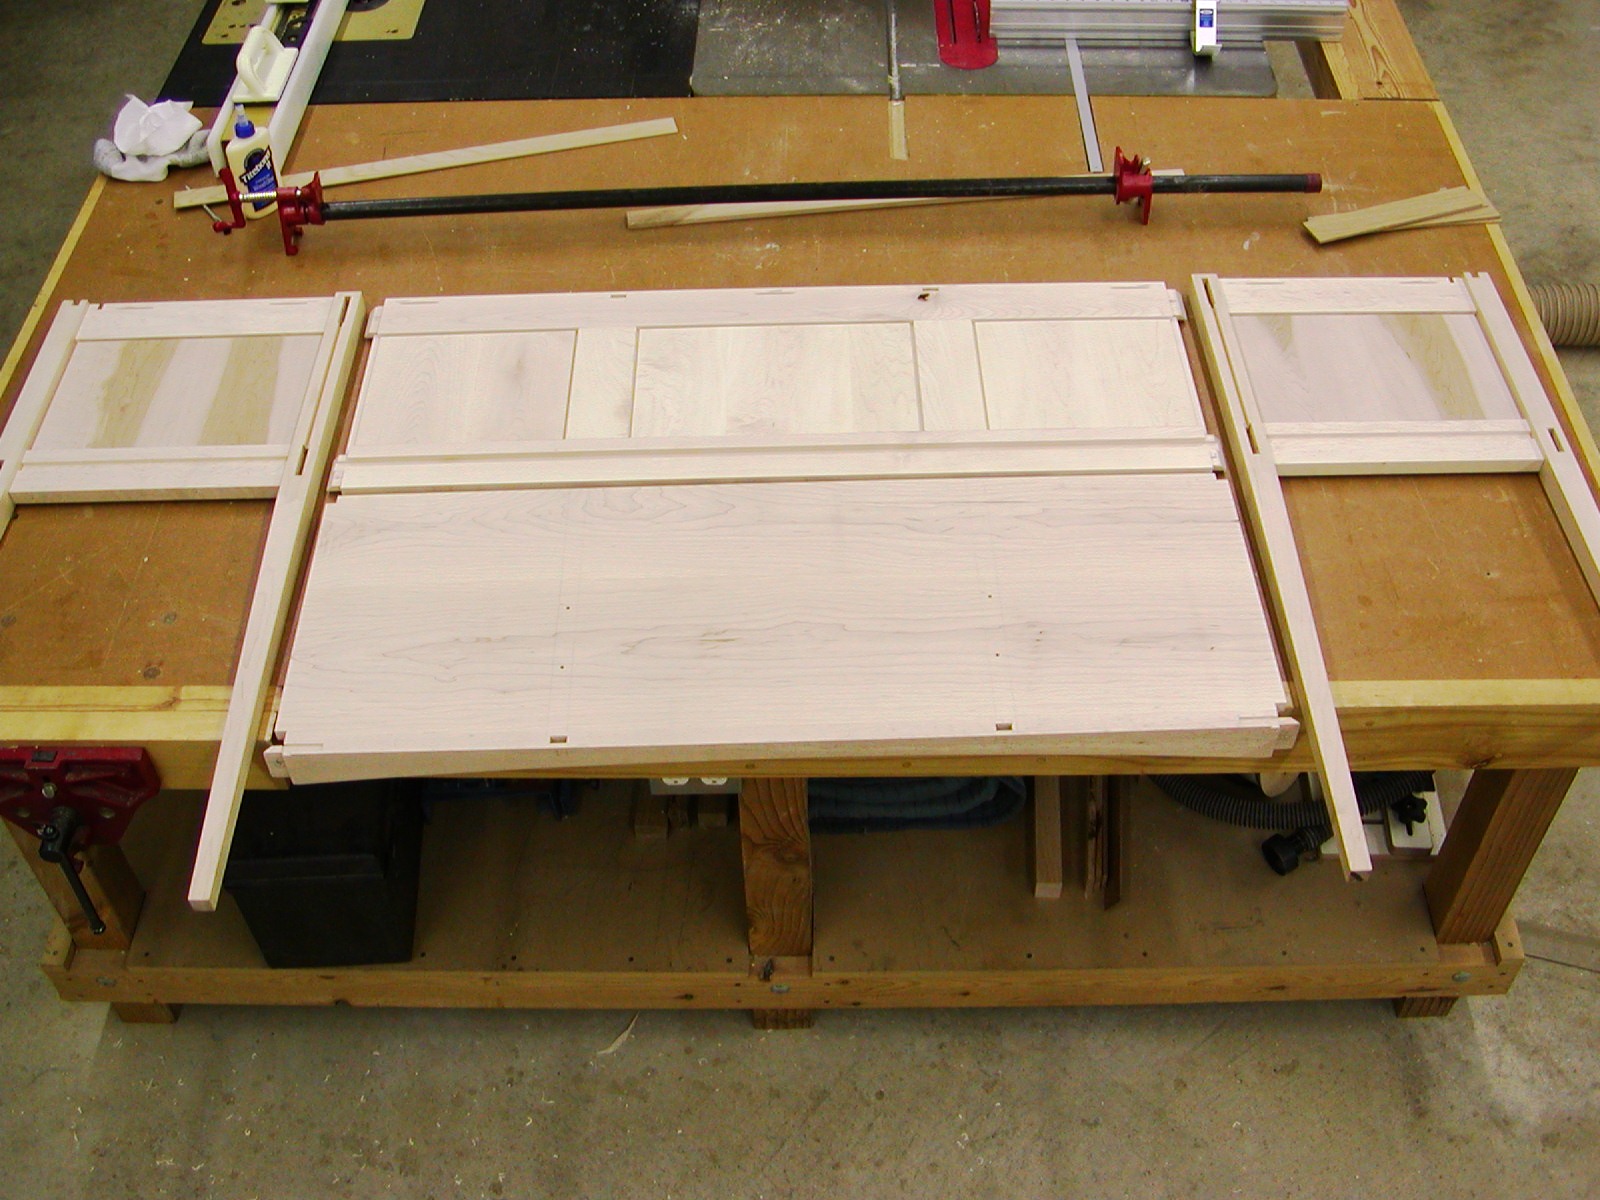
Door frames were built of bird’s eye maple and the panels of figured cherry, with the frame mortised and tenoned together and dadoed to accept the panel. The panel ‘floats’ along the outside edges of the frame, in order to allow for seasonal wood movement.

I created a simple jig just for installing knife hinges and it works not only for the door top and bottoms, but also for the stretchers (or blades) that support the hinges on the case. The jig is simply an outline of the hinge dimensions, with the thickness of the router guide added to it that allows the router straight bit follow the edge guide and mortise the proper size and depth for the hinge. A stop on the underside allows the jig to be spaced the correct distance from the door front, while the jig is clamped to the work. Simply flip the jig over and reattached the underside stop in order to router the hinge mortise on the opposite door. To do all the dovetails, I created a stopped-board that follows the desired dovetail angle (here, I’m using a 1/7). The jig is slid along the band saw fence with the work to cut the tails and then the work is flipped over for doing the opposite side of the tail.

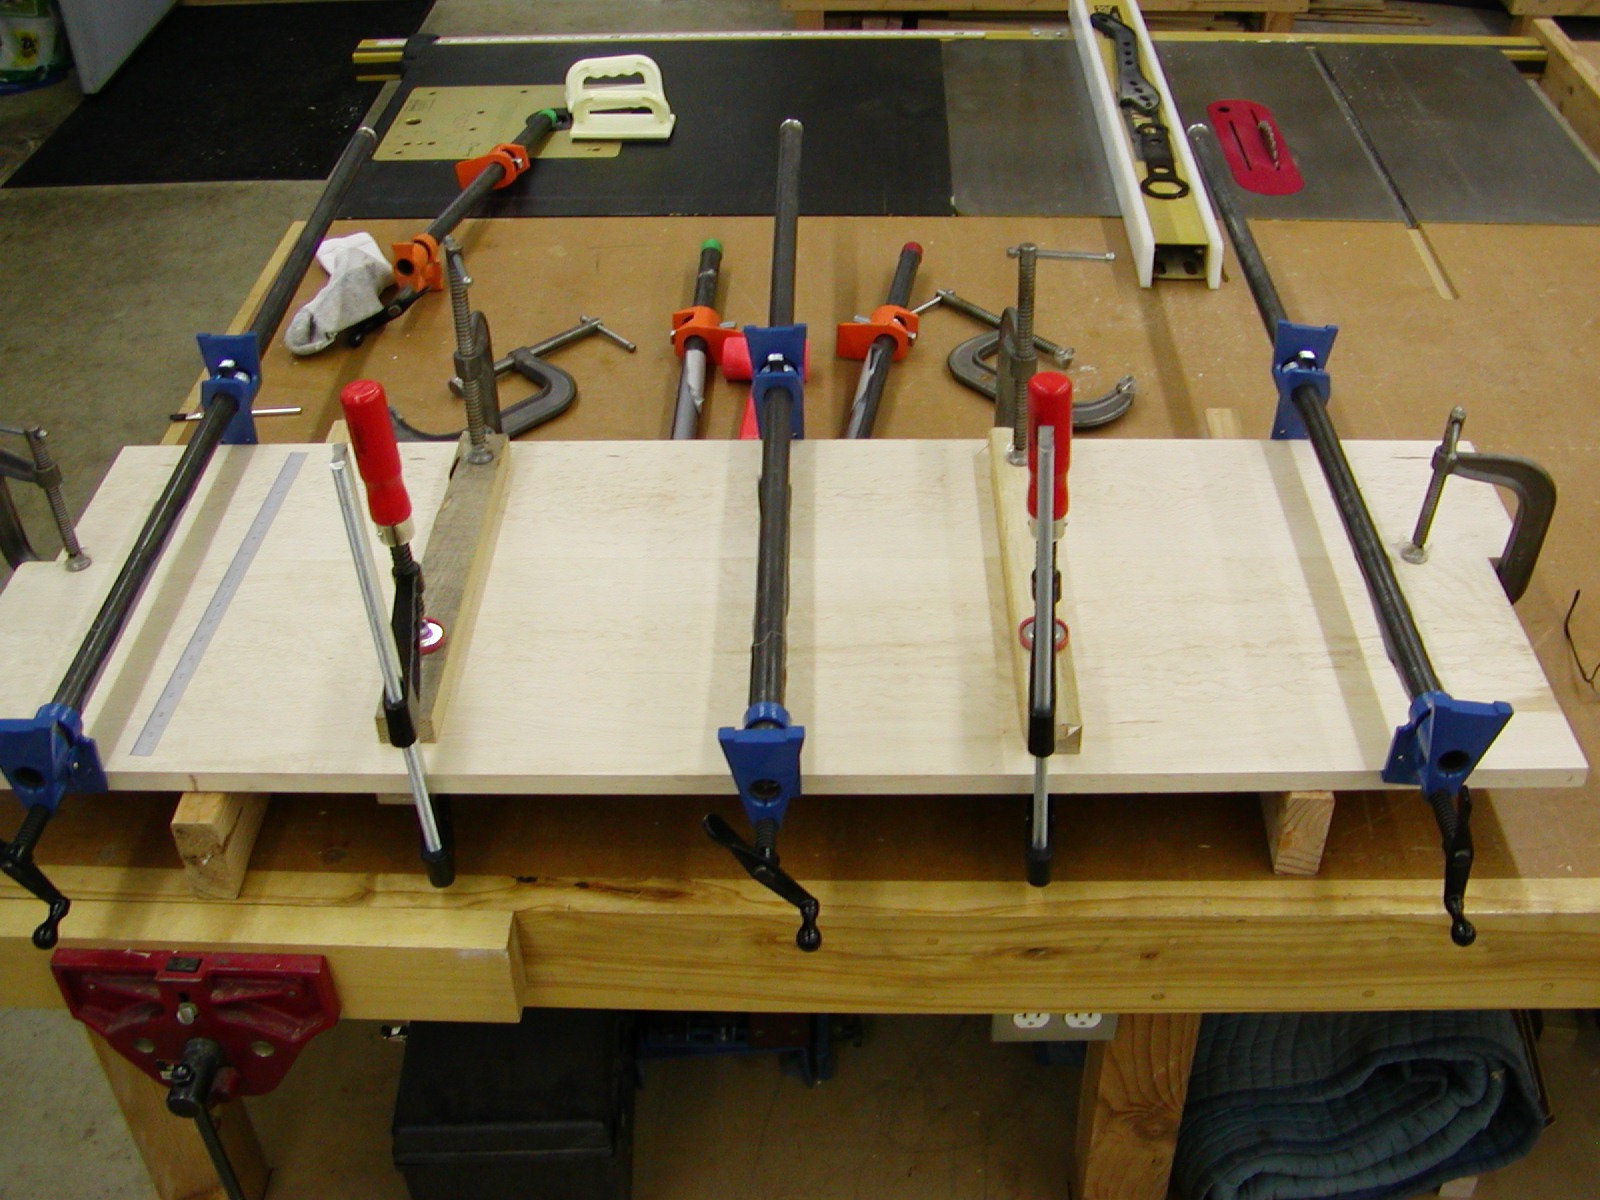
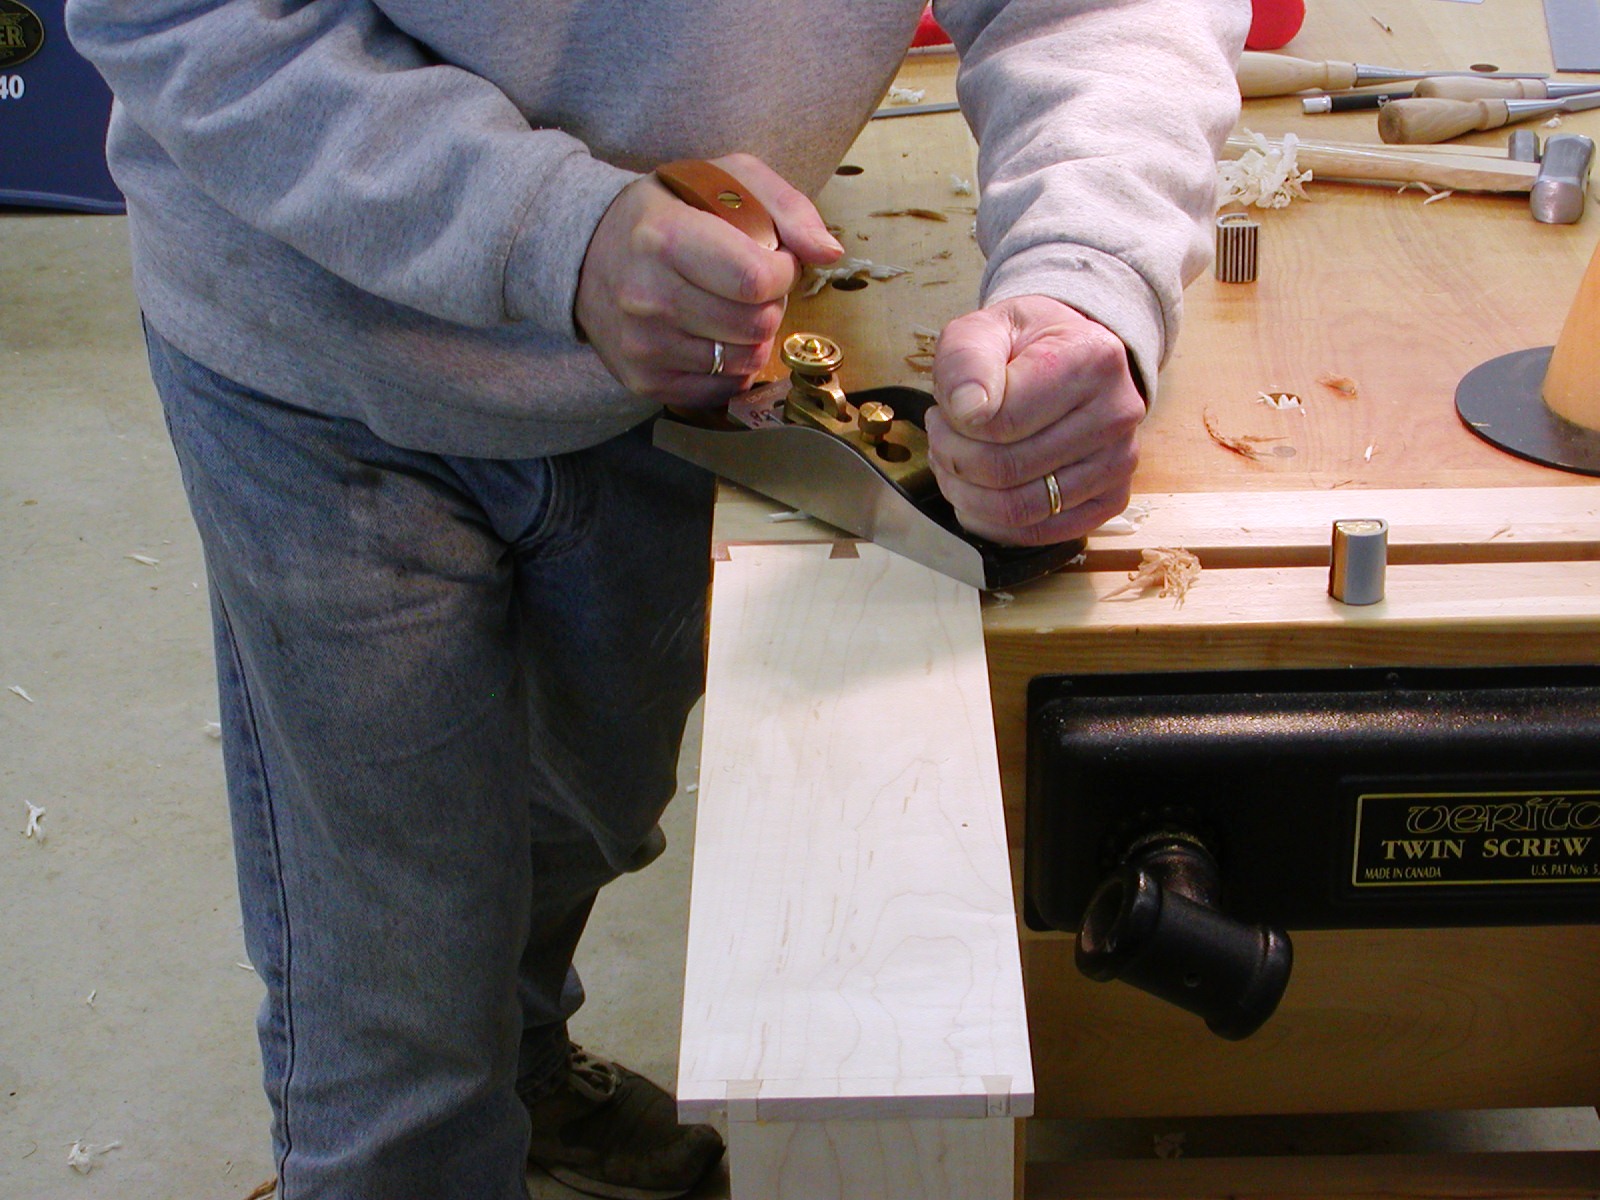
After assembling the drawers, I hand plane the tops, bottoms, and sides to fit them to the case. The Lie-Nielson #164 low angle smoothing plane, with a super-sharp 38 degree blade works perfectly for this task, even with the sometimes uncooperative maple drawer sides. Even though I took care to insure the drawers were square at glue-up, sometimes they still lack a perfect flush fit with the front of the case. To address this, the drawer bottoms (Alaska Birch, in this case) are glued (a little glue in the middle of each side, so as to still allow the bottom to seasonally move) while applying pressure to the drawer fronts in the case to achieve a flush perfect fit. When gluing up a large top like this, I generally like to use clamping cauls to insure as even a surface as possible. As this top to too large for my planer, I will need to use hand planes to smooth out all the imperfections of the glue-up and will want to make that process as painless as possible. Bird's Eye maple can have a very convoluted grain, making the use of scrapers also necessary.


Home